















Presentation "Atelier"
Hello! This post contains a short status report on the new system that is intended to replace the cutting and sewing system for ogee, formerly known as the "Cloth Palette."
You're probably bored or maybe thinking I'm doing something stupid again, but that's not entirely true. Today we'll be talking about the capabilities of the new "Atelier" system, which will be released in an update at the end of December 2025. Fundamentally, this system does the same thing as "Cloth Palette," only bigger and even better. So, let's go from there:
Main Panel :
The main control panel has undergone significant changes. This is primarily due to its design allowing for expanded functionality without the headache of control placement. The old system was too limited in this regard, so I'll try to avoid such issues in the new layout.
This preview is not the final version. Some design elements are subject to change.
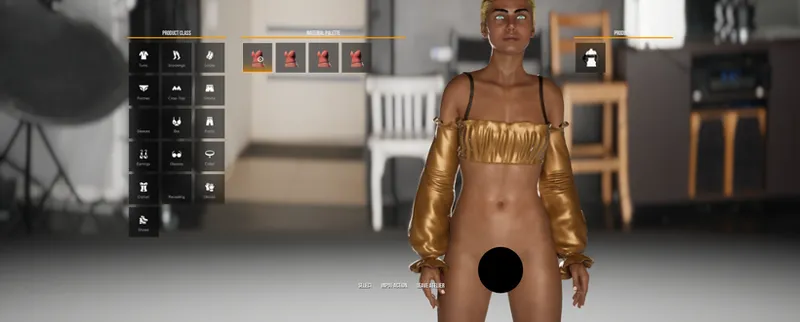
The layout for selecting a product layout remains largely unchanged. On the left is the "Product Class" panel—essentially a product classifier. Clicking it will reveal all garments in that class. On the right are garment layouts, which are updated automatically when you select a class.
The center panel is perhaps the main control. It can contain dynamic properties, item selection tabs, and much more. We'll discuss this in more detail later.
Dynamic properties :
The central panel can contain a wide variety of material property controls. In this regard, it has become smarter and more diverse, not least because it automatically generates all the options for modifying the garment layout. Simply click on the selected layout, and you'll see a list of available properties. The panel can include the following controls:
Changing the fabric (or garment) material.
Changing the fabric color by channel (up to three colors).
Fabric decal (a special pattern that adds some variety to the garment).
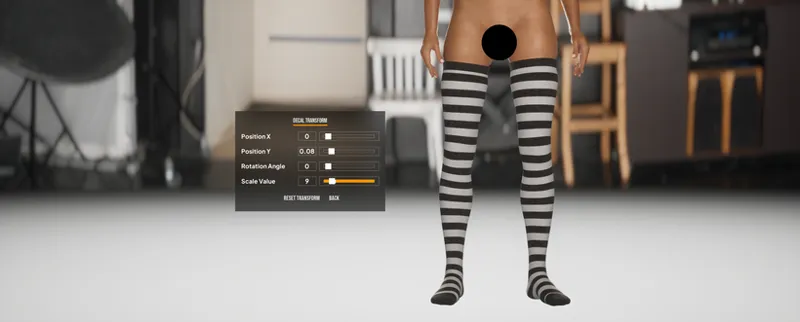
Decal transformation settings (offset, rotation, and size of the selected decal).
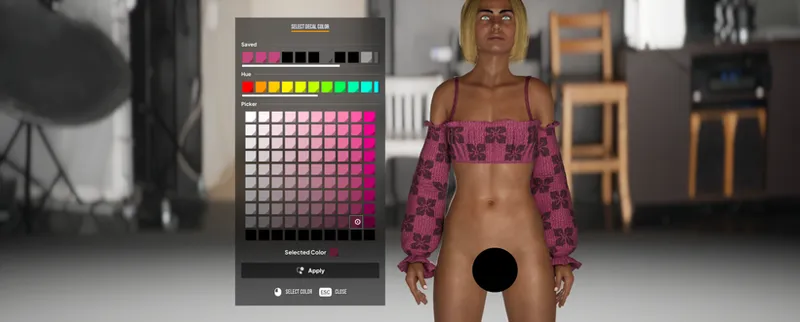
Decal color (changing the color of the selected decal).
Translucent lace (selecting a special mask for creating lace parts of the garment).
Now about all the properties in order.
Product material :
There's nothing complicated about it. Any product can contain any number of materials, depending on the complexity of the piece itself. I generally limit production to just one material slot, but this can be changed if, for example, the product contains several fundamentally different surfaces that need to be customized.
The material slots available for modification are displayed on the main panel and numbered accordingly. Clicking on one opens a panel containing all available materials for the selected part of the item. Feel free to choose any one. The selected material will become the basis for further editing.
Product color :
Another significant change compared to the previous system: you can now customize not only the primary color of the selected material, but also the color of each material individually (depending on whether it's editable) and even more—the color of multiple parts individually.
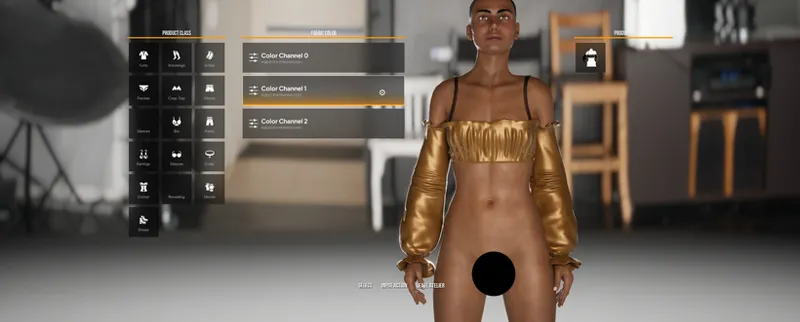
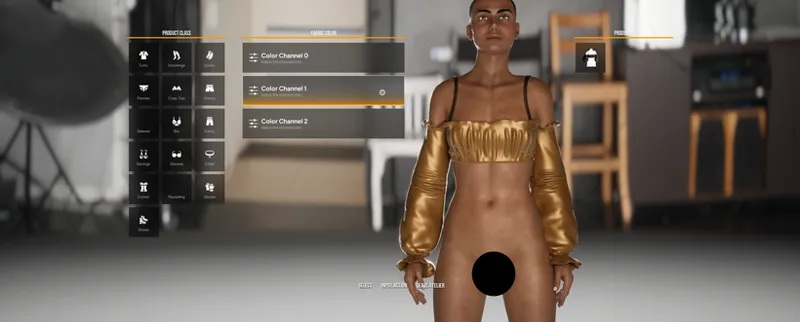
Clicking the color properties button next to the selected material takes you to the color channels panel. By default, you can customize up to three product elements made from the selected material. The number of available color channels may be fewer (depending on the complexity of the product), but can never exceed three. This is an artificial limitation due to the material's division into RGB channels.
In the example above, we're working with a standard Spy crop top. It contains only one customizable material, which has settings for three color channels—the top, sleeves, and straps, respectively.
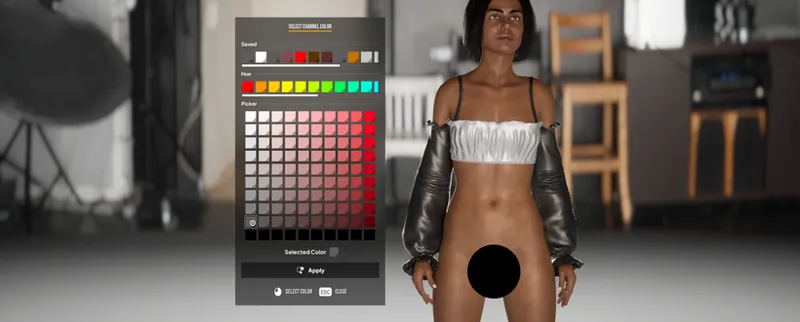
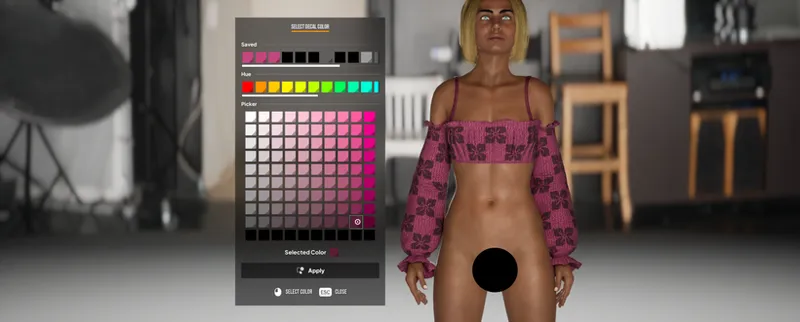
Selecting one of the channels will redirect you to the "Color Picker" pop-up panel. Yes, this is the same panel you use to change your hairstyle's color in the hub, and the studio now supports it too— no more awkward sliders!
Product Decal :
This was probably the most difficult decision in terms of how to simply and effectively add variety to the fabric of the garment. I was inspired by some old clothes that had the most daring patterns woven into the fabric, and many expensive clothes from prehistoric times have unusual embroidery textures. Now we have decals, gentlemen!
Essentially, this is a simple redefinition of the color of those parts of the fabric that intersect a special mask. By clicking the "Decal" button attached to one of the material slots, you access the "Decal Palette." A wide variety of decals are available to choose from, adding a touch of variety to your wardrobe. Changes are now previewed in real time, so simply hover over the selected design to see how it will appear on the garment.
Decal Transform :
The first property of decals is their placement on fabric. Regardless of the complexity of the product, if it supports decals, it also supports their properties. Click the first button to the right of the decal slot and go to the decal properties.
There are 4 options to choose from:
Pattern offset along the X axis.
Pattern offset along the Y axis.
Pattern rotation around the center.
Pattern size.
In the example above, we selected a stripe decal, adjusted the desired stripe width using the size modifier, and slightly shifted their height. Since decals are simply textures, their pattern is duplicated equally when resized, allowing for a consistent pattern across the entire fabric surface.
Using the provided opportunities, you can create unique fabrics, however, everything depends on your imagination.
Decal Color :
Another element of decal control is decal color control.
There are no fundamental differences here with the same change in the main color of the fabric - just choose the desired color.
By combining all the decal properties, you can create quite expressive images from clothing already existing in the game.
Translucent lace :
Ooooh, you'll love this! Fabrics now support transparency masks for lace and patterned products.
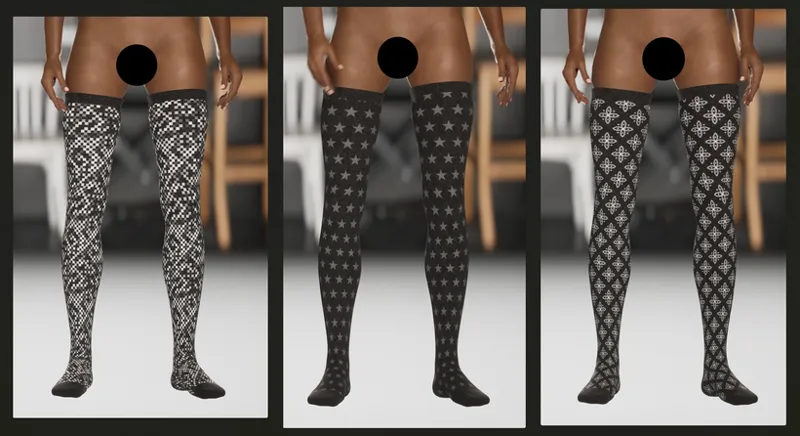
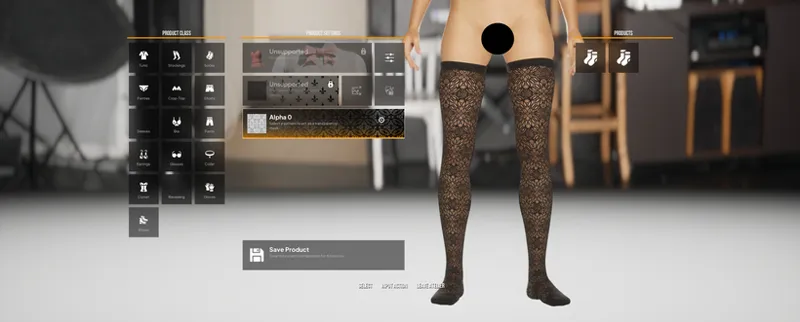
The new material framework allows you to use highly detailed masks as clipping paths and produce textiles with complex patterns. This type of textile is typically used in lace lingerie, tights, stockings, and socks, and yes, the editor allows for customization.
Selecting a mask is done in the same way as selecting a material or decal. On the main panel, you'll see buttons assigned to each material, as well as their availability. Currently, they can only be used on stockings, but in the future, I think we'll be adding cool lace clothing and underwear.
By clicking on the edit mask, you are taken to a panel containing over 100 unique patterns that are actually used to make similar products.
Masks are pre-made and used as a base for displaying the product, so they don't have any additional editing properties. However, you can still access other editable properties and change the material's color. Materials containing masks also don't support decals by default, as blending them often creates visual clutter or something completely unintelligible.
So, I'll tell you a little more about the changes that will change the user experience.
Preview :
A preview mode has been added. All editable properties support it. What does this mean? After you open any property panel, you can hover over menu items to preview how fabric materials, colors, decals, and other items will look. If you decide not to apply the changes, simply return to the main menu to discard the changes and revert to the last configuration (the state of the last edit).
Baking the fabric :
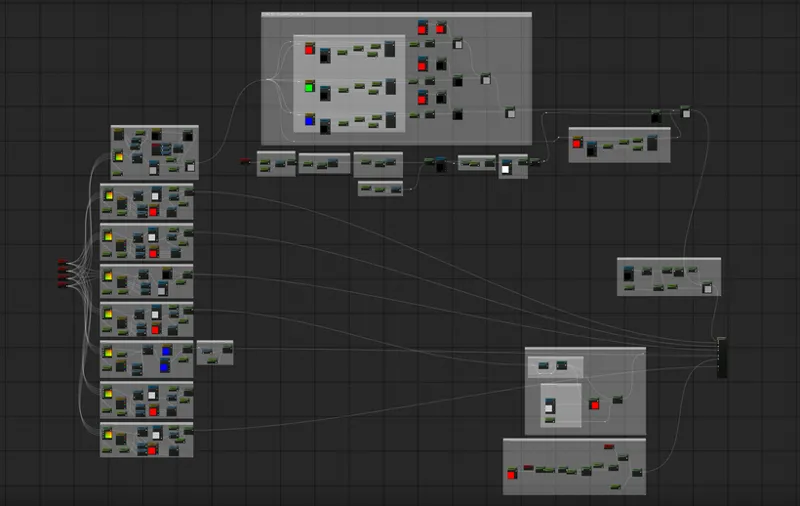
I've raised the bar a bit regarding the appearance of materials. In the previous cut-and-sew system, materials contained only the necessary fabric textures, but in the current case, that simply wouldn't work and looked cheap. Now you'll be dealing with pre-baked materials, with everything included (cuts, embroidery, dents, stains, deformations, and more).
Smart Mixing :
Correctly changing the color of clothing is perhaps the main problem with all editable clothing. In short, if you simply fill a wool texture with black, you'll get a black texture (without any wool). However, I've taught materials to change the color of fabric without losing its fundamental properties, which is what makes a clothing texture what it is.
1 - Default wool texture
2 - Texture with normal blending (black)
3 - Texture with Smart Mixing (black)
Transparency intensity mask :
Transparency intensity masks are used to isolate areas of clothing that don't inherently require transparency. For example, this eliminates the need to split a clothing mesh into multiple materials and bake transparency textures into them. Thus, using a single mask, you can isolate transparency for a specific area of stockings to use pattern textures. You can also do the same for the rest of the clothing, working with the same resources without the need for time-consuming work.
Decal isolation mask :
Decal isolation masks are essentially the same as described above, but for decals. Some clothing may consist of multiple connected parts, metal parts, sleeves, elastic bands, areas with sharp bends, and other problematic areas where you don't want the decal to be visible, especially if it's carefully adjusted.
Well, that was quite a challenge. I hope you can quench your thirst for colorful, fancy clothes, lol. Again, Atelier will appear in the update at the end of December, so I think I'll still have time to share some nice clothing-related details.
Okay, this report turned out to be quite lengthy, so see you soon!
Comments (1)
Clothing customization system that crushes major games actually centered around customization is in fact exactly what I want and I will not have it any other way