
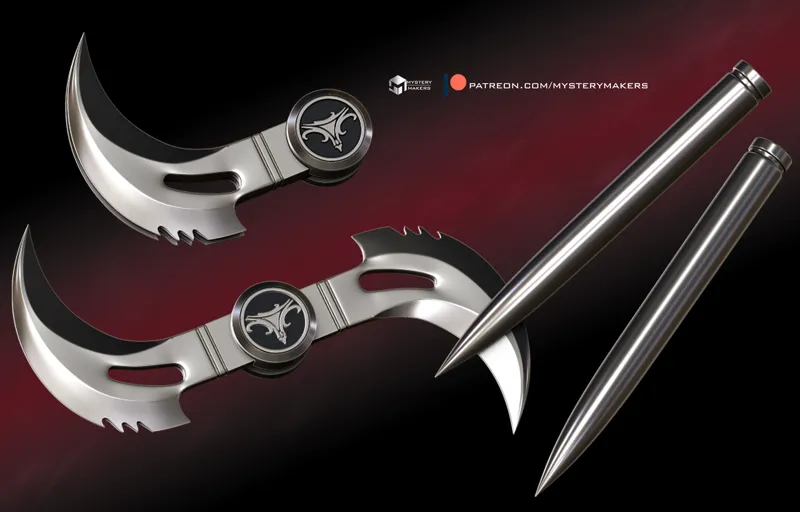
Blade functional Glaive and Stakes - ready for download
Before I get into it—don’t worry, the sword holder and the gun are on the way too. I just managed to finish these two first.
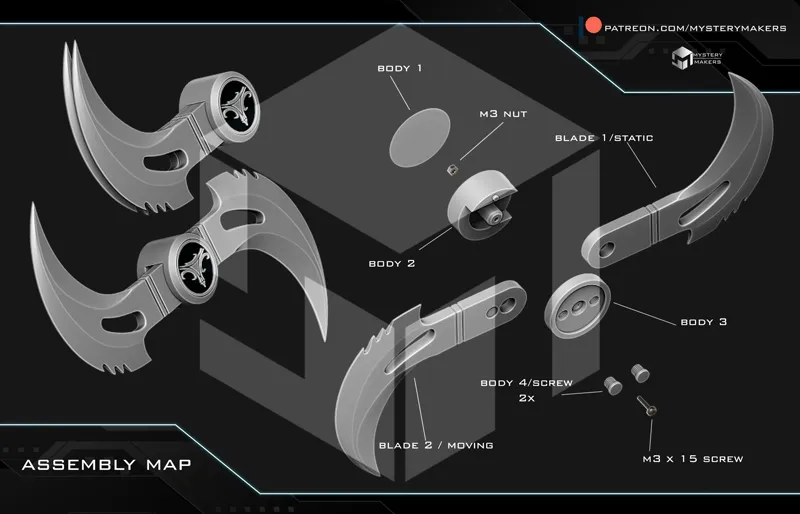
The Glaive is something I’m really happy with. It uses an M3 screw and nut for structural strength, along with two small printable bolts that let you flip the glaive open or keep it closed. It’s being printed right now, and I’ll show you how it all works once the first print is done.
I used official auction photos and sizing taken directly from the actual movie props, so when it comes to accuracy—this is about as close as it gets.
The blades can be a bit tricky to print, so I included three print suggestions for those blades inside the 3MF file. If you find a better way to print them, definitely let me know so I can update the file for everyone.
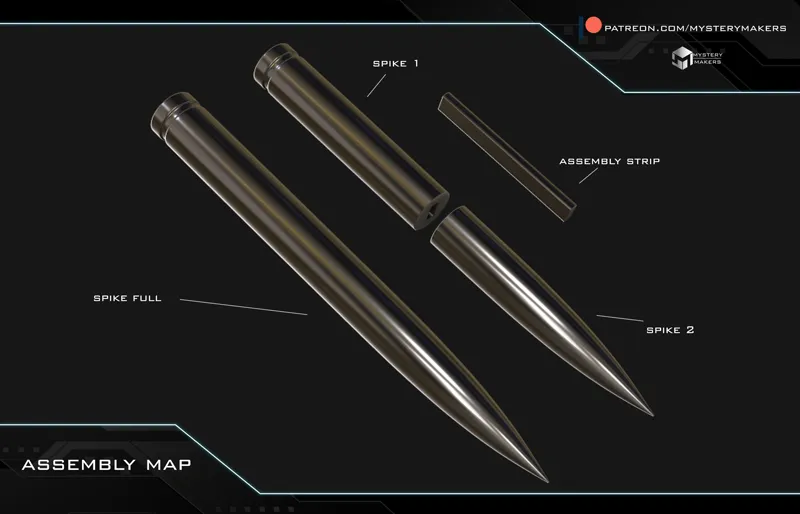
The Stakes are pretty straightforward. Just a heads-up—in my build guide you might see them labeled as Spikes (no idea why I kept calling them that), so just ignore that. Stakes = Spikes in this case.
You’ve got two options on the Stake:
A fully combined version
A pre-split version with a press-fit strip for added strength and small printer bez sizes
And for those of you doing crazy good electroplating work… these two were basically made for you, even if you don’t know it yet.
That’s it for now—just wanted to give you something quick and fun to print.
Happy printing, guys!
Marko
Comments (19)
Where can I find the downloads?
Well Ive been blown away by how easy the plugs have screwed in by just changing the LAYER HEIGHT (and well, printing speed, so in the end perhaps default "standard speed" is too much for these parts to fit properly ;)). Are you finally making "anything" to temp hold the second shield in? aka holes for small magnets? ;)
i'm afraid there will be no changes to it , i've given it some thought and it would just be in the way having to remove the shield to get to the screws, then add back the shield, then small magnets will not be as strong, so as you are holding it the palm, the shield might move _ i dont like parts that can fall off, so to be honest i just dont like it XD so i will not make it part of the standard release. thank you for understanding :) cool thing is tho that with any slicer today - like prusa or bambu, you can just add negative space by adding 2 cylinders, and add the magnet slots if you feel it would work better for you :)
https://www.thepropgallery.com/blade-wesley-snipes-hero-glaive
Well I start to get the idea now. I would have still made a small flat head screw head you could just turn with the nail tho :)
Am I the only one finding EXTREMELY hard to manually screw the two plastic studs in? Wouldn't it be easier with a flat recess for a screwdriver?!
if you are having problem with screwing those in it is likely you need to revisit filament/printer settings - the screws have 0,25 mm offset on each side wich makes it not only easy to insert and screw but a bit on the loose side - i will show a video of it soon . the reason why i make more and more printed parts is bcs thats what is requested. every time there is a list of something that needs to be pruchased i am asked why not make something printable instead. the only thing that will be too week to print is the middle screw taht holds it in - the rest can be printable - but long story short - you should not have any issues with the screws - print them at 0,1 mm layer height, recalibrate filament flow and settings, if you still have trouble after that, i would start looking into machine error another reason why i didnt opt for the screwdriver option is cosplay - not many cosplayer carrry arround screwdrivers to switch between options, and i am quite sure people would be more mad at me for making a design that needs a tool they have to carry arround compared to just screw those bits in whenver you feel like it sorry for my super long rambling - but as i mentioned, it was designed not to be problematic at all - i printed one myself and it is super smooth, and easy to insert, i will be making an assembly video soon as well - if you like drop me a message i can show you, and we can go over your settings together and solve it all - it shoudl be a super nice and easy fit :)
Hi Marko, the moving blade is missing a second hole for the screw as shown in the image. Is this correct ?
nope, there is no hole missing , just checked the files :) keep in mind, the other hole is on the other side of the blade
Just a tip, the glaive blade with the blade edge facing up printed great for me at .12 layer height using normal supports with "snug" style
Perfect, thank you for the feedback :)
Ok, you could easily apply the glaive technique to the Batman Forever Sonar batarang. That would be something I could use. https://propstoreauction.com/lot-details/index/catalog/386/lot/126125/Lot-37-Batman-s-Val-Kilmer-Metal-Sonar-Batarang-BATMAN-FOREVER-1995
Keep them coming
Any plans to make a holster/display for the stakes?
I thought those were elastic straps in the movie, are they not ? Need to track more images to make sure
Heck yeah! Gonna need some silver stakes now too lol
Haha they are included, check other photos and post text :)
Sweet
I really want to get into electro plating. But dont want another money sink lmao