Yes, it’s undeniably satisfying to fly a tight, picture-perfect formation in DCS World. The screenshots are stunning, and who wouldn’t want to be just feet away from their favorite fighter jet, wingtip to wingtip? But formation flying is more than just visual flair. Tactical formations have been developed as powerful combat multipliers — grounded not only in decades of air force doctrine, but more importantly, forged through hard-earned operational experience.
When flown correctly, formations enhance mutual support, broaden sensor coverage, and increase survivability. When flown poorly, they erode situational awareness, overload the wingman, and can compromise an entire flight before the first missile is even fired.
In this article, I’ll try to make a concise review of standard two-ship formations, followed by a look at the most common mistakes DCS pilots make — and the tactical consequences that follow. This analysis draws from real-world experience, including a USAF Red Flag study on formation performance breakdowns.
1. Tactical 2-Ship Formations
1.1 - Line Abreast
Line abreast should be the default geometry for operations in any contested environment. Its principal strength lies in the broad sensor coverage it offers, both through radar and visual lookout. Each pilot maintains their own radar scan sector and rear-quarter watch, enhancing mutual support and reducing the risk of surprise engagements. This formation enables rapid reaction maneuvers — whether offensive actions like bracket or pincer attacks, or defensive transitions into air combat maneuvering under optimal conditions. It also allows the flight to operate with tactical independence while remaining coordinated as a unit.
However, this formation demands a high degree of pilot proficiency. Maintaining proper spacing — typically between 1.5 and 3 nautical miles, depending on altitude and speed — requires both experience and situational awareness. At low altitude, visual contact becomes more difficult, making spacing management even more challenging. Turns in line abreast must be clearly briefed and visually coordinated to avoid crossovers, especially when bandwidth is limited. Without that discipline, the formation can quickly break down — or bring aircraft uncomfortably close at the worst possible moment.
1.2 - Wedge
Wedge formation offers more flexibility, particularly when maneuvering in a very dynamic or in a terrain-constrained environments. The wingman maintains a position 30 to 45 degrees aft and offset from the lead, allowing the lead to maneuver freely. This geometry reduces the risk of immediate conflict in a hard turn or pop-up maneuver. Wedge is particularly effective during the attack run before target engagement, or situations requiring unlimited manoeuvers.
Its drawbacks lie in the reduced rearward visual coverage, particularly for the wingman, whose six o’clock is left completely unmonitored. Compared to line abreast, wedge also reduces radar separation, narrowing the formation’s overall sensor footprint. Under stress or during dynamic maneuvering, it tends to drift into a loose trail formation — especially if the wingman loses visual reference or becomes task-saturated.
Example of a wingman drifting in a trail formation, losing most of the mutual support offered by a good combat formation.
1.3 - Fighting wing
Even though fighting wing is technically a tactical formation, it is generally not a good combat formation and should only be used as such in very specific circumstances. More commonly, it serves as a training, administrative (transit in friendly airspace), or weather-constrained configuration. It allows less experienced pilots to maintain station more easily and can support short-duration attack phases by concentrating firepower. However, in most contested environments, it offers little to no tactical advantage.
One example of the few situations where fighting wing may be the most appropriate choice is during buddy lasing under radio emission constraints, such under heavy radio jamming. In such cases, the lasing aircraft must visually acquire the bomb release and begin lasing at the correct time without relying on voice comms. The close geometry of fighting wing can make that task significantly easier.
The most common mistake in fighting wing is for the wingman to remain permanently in the leader’s control zone — a rear position where the lead cannot maintain visual contact. This is not just a situational awareness issue; it’s a safety hazard. The lead must be able to see the wingman regularly — not only to confirm they’re still in position, but more critically, to avoid initiating a sudden break or hard maneuver that could place the wingman at serious risk. Formation flying, even in non-combat setups like fighting wing, still demands continuous mutual awareness.
Example of a wingman in the control zone: holding formation is effortless from this position, but the wingman is completely invisible to the leader. This geometry should only be used briefly during hard maneuvers. Once level flight resumes, the wingman should reposition to a proper 4 o’clock line with slight lateral separation. A second issue shown here: at very low altitude, the wingman must maintain positive staging in fighting wing to avoid terrain-induced collision risk.
2. Common Formation Mistakes in DCS
2.1 - Mistake 1: Flying Too Close
This is by far the most common — and potentially most dangerous (setting aside the fact that we’re flying from a desk…) — error seen in DCS World. Many players treat close spacing as a proof of skill, holding position within just a few dozen meters of their lead. In reality, such tight formations dramatically degrade tactical effectiveness. The wingman becomes fixated on avoiding a collision, sacrificing their ability to scan for threats or operate their weapon systems independently. The result is not a two-ship — it’s one distracted aircraft and a flying blind spot.
Too close to be effective: while acceptable during RTB in friendly airspace, this formation is unsuitable for combat. In particular, the spacing is too tight for defensive maneuvering. Worse, the wingman’s attention is fully consumed by avoiding collision, leaving little cognitive bandwidth for lookout duties or weapon employment.
When formation spacing is too tight, radar coverage becomes redundant, creating blind spots instead of expanding situational awareness. The formation loses its ability to execute reactive maneuvers like breaks or brackets without risking a mid-air conflict. The Red Flag study confirmed that excessive proximity led to task saturation, especially under threat. Pilots flying too close frequently failed to detect or react to contacts in time, directly impacting mission performance.
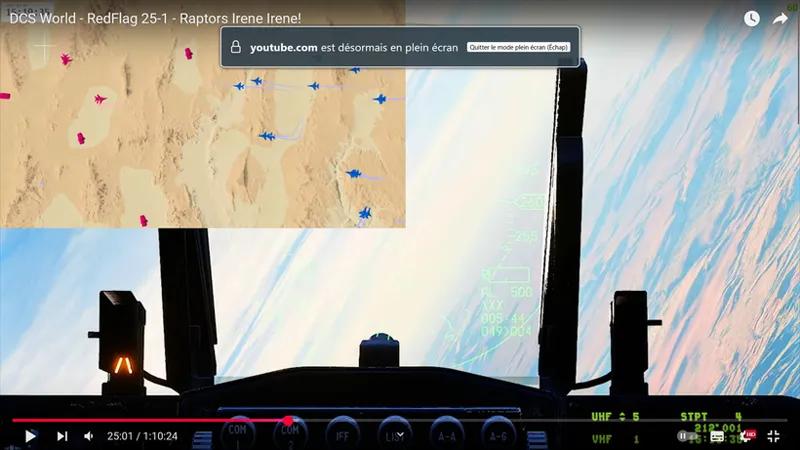
On this picture, we can see that most participants have remained in an overly tight formation even after the engagement has begun. This severely reduces overall tactical effectiveness.
Appropriate spacing depends on altitude and speed. Below 5,000 feet AGL, a lateral separation of 1.5 to 2.5 nautical miles allows for safe jinking, rapid defensive turns, and effective mutual support. At medium altitude, increased turn radius requires expanding the spacing to 2.5 to 3.5 NM. At high altitude or during supersonic flight, spacing should grow to 4 to 5 NM to preserve maneuvering room, radar separation, and deconfliction.
As explained in this excellent video by Mike Solyom, proper formation spacing must allow sufficient turning room for immediate weapon employment during a defensive ACM.
2.2 - Mistake 2: Flying on the Wrong Side
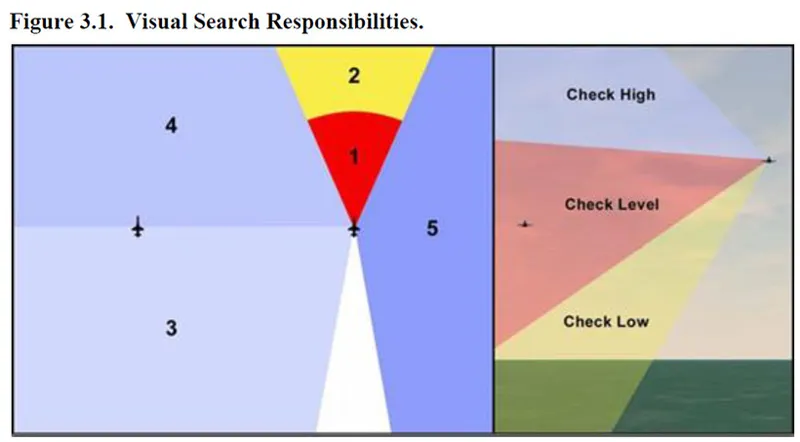
Wingman placement — left or right — is not cosmetic: it’s a tactical decision. The correct side in a formation is determined first and foremost by the expected threat axis, not by habit or convenience. The wingman should always be positioned opposite the most significant anticipated threat, whether it’s air-to-air or surface-to-air. This ensures the formation maintains visual coverage toward the most likely source of danger. After deconfliction, threat detection is the wingman’s primary responsibility — and that begins with being on the right side of the formation.
Reminder of lookout responsibilities as per AETCTTP11-1.
If no threat is currently expected, the wingman’s position should be opposite to the direction of the most significant nearby air traffic — particularly aircraft that are closest, converging, or carrying out non-coordinated operations (like tankers if you are rejoining).
If air traffic isn’t a factor, terrain hazards — such as antenna farms, high ground, or urban areas — should guide wingman placement. In peacetime, overflying a city should be avoided for noise abatement and civilian disturbance. In wartime, the stakes are higher: flying directly over a populated area increases the chance of being visually detected, tracked, or even engaged. Cities and villages may conceal small arms fire, AAA, or MANPAD threats.
If none of these are present — for example, at medium altitude over flat terrain — then sun position becomes the deciding factor. A bandit attacking from out of the sun can mask their visual and IR signature until it’s too late to react.
Note: in a 4-ship formation, Element Lead (#3) holds the responsibility for defining which side their element (positions #3 and #4) will take relative to the lead element. This decision is based on the same tactical logic that applies to two-ships: threat axis, terrain, air traffic, or sun position.
2.3 - Mistake 3: Mismanaging Turns
Uncoordinated turns are a leading cause of formation breakdowns. Whether it is a bracket, hook, or shackle, if the turn direction or spacing logic is unclear, the formation quickly devolves into chaos. This is especially common in DCS multiplayer when players execute turns based on intuition rather than pre-briefed contracts.
The Red Flag report identified poorly executed or uncoordinated turns as one of the leading causes of tactical breakdown during threat ingress. In high-stress environments, formations frequently lost integrity due to ambiguous turn direction, unclear lead roles, or mismatched expectations on turn rate and geometry. The solution to this is entirely procedural: every turn must be planned and briefed.
In virtual squadrons, this should be codified into clear SOPs. For example, are standard tactical turns expected to be constant-rate or maximum sustained? In line abreast, at what heading change do pilots switch sides — is it 30°, 40°, or something else? These questions should not be left to improvisation mid-flight.
Establishing standardized turn contracts and deconfliction logic is one of the easiest ways to preserve formation effectiveness and survivability.
2.4 - Mistake 4: Making Formation Flying Entirely the Wingman’s Problem
One of the most overlooked errors in formation flying — especially in DCS — is treating it as the wingman’s sole responsibility. While it's true that maintaining position ultimately falls to the wingman, successful formation flying requires active cooperation from the lead. This is especially true during high-performance phases of flight, where energy margins are tight and small deviations quickly become unmanageable.
At combat speeds, a wingman cannot magically “snap back into place” if the lead pulls away with no consideration for geometry or energy state. A good flight lead understands this and actively helps their wingman maintain or regain position. That support comes in the form of smart geometry: giving a few extra RPMs during acceleration, easing off throttle just a moment sooner during deceleration, using a subtle shackle to aid rejoin, or adjusting headings to facilitate smoother transitions.
This becomes critical in line abreast formations. If spacing is too tight, both aircraft can simply kick out 10 degrees to open the distance together. If one aircraft drifts ahead, a brief shackle or s-turn allows the other to re-establish visual alignment without burning excessive energy or breaking formation integrity. These micro-adjustments cost nothing tactically but make a huge difference to formation cohesion.
A good lead has spent time as a wingman — and remembers what that feels like. Leadership in the air means anticipating friction points and proactively creating space, time, and energy for your wingman to succeed. If formation breaks down despite those efforts, then — and only then — is it fair to place responsibility on the wingman.
3. Consequences of Formation Errors
Bad formation flying is not just inefficient; it is lethal. The most immediate consequence is the loss of mutual support. Two aircraft flying tight or mirrored will cover only a fraction of the airspace around them. Threats approaching from behind or the flanks will go unnoticed until it's too late, and will kill both aircraft in one shot, or nearly...
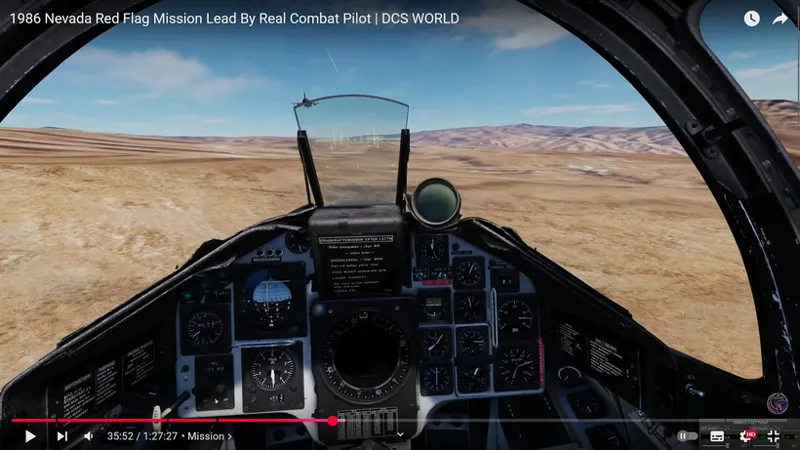
Visual scan is similarly degraded. When the wingman is fixated on the lead, their contribution to lookout coverage drops to near zero. This effect is well-documented in Red Flag report, where pilots flying in tight formations under stress failed to detect visual threats in time to respond effectively.
Reaction time is another casualty. Sudden breaks, jinks, or reversals can result in collision or near miss. This makes reactive maneuvering nearly impossible and renders the formation tactically inert.
Perhaps the most insidious effect is task saturation. Wingmen flying too close simply cannot keep up with the cognitive load. Their energy is spent on formation keeping, not threat reaction. This leads to early losses, delayed support, and fragmented tactical responses.
4. Takeaways for DCS Pilots
First, treat formation flying as part of your weapon system. Tactical formations exist to help you fight, not just to look nice. Use line abreast as your default, unless you have a strong reason to switch. In low-level or dynamic maneuvering scenarios, wedge may be appropriate, but do not let it drift into trail or fighting wing.
Spacing must reflect your flight parameters. Faster or higher requires more room, not less. You should always have enough lateral space to execute a turn into a threat without entering the minimum range of your own weapon.
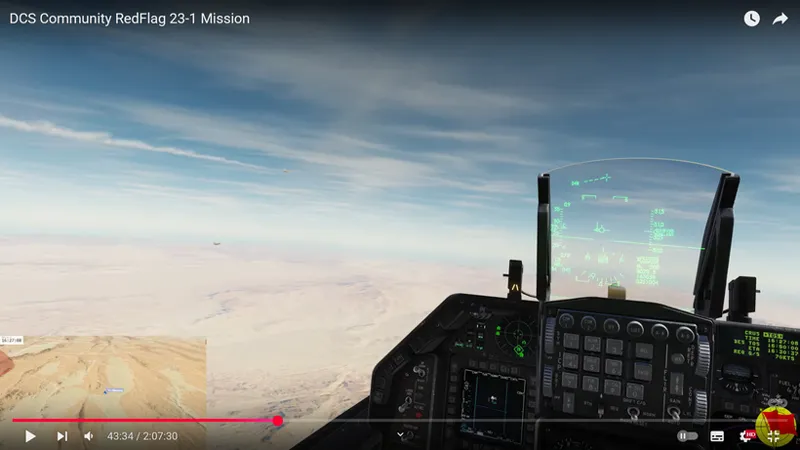
This is what a correct spacing look like in combat. Yes, they look tiny, but it's normal...
Wingman positioning should be chosen with intent. Start by countering the threat axis. If unknown, counter terrain or air traffic, and only then factor visibility elements like sun. Brief this before every flight.
Communicate when needed — and do so precisely — to support your flight lead. One of your key responsibilities as a wingman is to expand the formation’s awareness, not to assume the lead sees what you see. For example, call contrails when they begin (“Hornet 2, marking, angel 26") and when they end (“Hornet 2, end of cons.”). Just as important, call out any visual traffic — even if you think the lead has seen it. Never assume. If it’s in your sector and not declared, report it.
Finally, debrief formation performance. Every sortie should end with a simple assessment: did we maintain spacing, did we cover scan sectors, and did we fly the briefed plan? If not, fix it next time.
Conclusion
Flying good formations isn't easy — but it’s essential. It requires discipline, awareness, and mutual understanding. But when it all clicks, it’s not only tactically effective, it’s first and foremost incredibly satisfying.
If you want to survive and win in DCS combat scenarios, formation flying is a skill well worth mastering. I hope this post has helped clarify not just what formations to fly, but why they matter, and how to make them work for you.
Thank you!
Note: to go further, I’ve attached three excellent reference documents that complement this article.
Formation Flying – Pilot’s Knowledge Guide: for beginners. Though aimed at civilian pilots, this manual distills decades of military formation flying experience and covers comms, responsibilities, safety margins, and geometry.
Guide to Tactical Formations: a practical summary of two-ship and four-ship tactical geometries used by modern air forces.
Red Flag – Performance Assessment: a USAF study evaluating tactical formation performance during simulated combat at Red Flag.