



MultiTalk Levelled Up - Way Better Animation Compared to Before with New Workflows - Image to Video
🔗 Newest tutorial ⤵️
▶️ https://youtu.be/wgCtUeog41g
MultiTalk is greatly upgraded. After doing more than 1 day more research with MultiTalk by using 8x A6000 48 GB GPUs, I have significantly improved the MultiTalk workflows and now I am sharing 4 different category workflows with you. VRAM usages and speeds are same but just better quality and animation. Moreover I am introducing a new app which is image and video comparison sliders. Ultra fast and lightweight. Runs as a html app and no GPU is required.
🔗 Main Tutorial That You Have To Watch ⤵️
▶️ https://youtu.be/8cMIwS9qo4M
🔗Follow below link to download the zip file that contains MultiTalk bundle downloader Gradio App - the one used in the tutorial ⤵️
▶️ https://www.patreon.com/posts/SwarmUI-Installer-AI-Videos-Downloader-114517862
🔗Follow below link to download the zip file that contains ComfyUI 1-click installer and the WORKFLOW shown in tutorial that has all the Flash Attention, Sage Attention, xFormers, Triton, DeepSpeed, RTX 5000 series support ⤵️
▶️ https://www.patreon.com/posts/Advanced-ComfyUI-1-Click-Installer-105023709
🔗Follow below link to download the zip file that contains Image and Video Comparison Slider App⤵️
▶️ https://www.patreon.com/posts/Image-Video-Comparison-Slider-App-133935178
🔗 Python, Git, CUDA, C++, FFMPEG, MSVC installation tutorial - needed for ComfyUI ⤵️
▶️ https://youtu.be/DrhUHnYfwC0
🔗 SECourses Official Discord 10500+ Members ⤵️
▶️ https://discord.com/servers/software-engineering-courses-secourses-772774097734074388
🔗 Stable Diffusion, FLUX, Generative AI Tutorials and Resources GitHub ⤵️
▶️ https://github.com/FurkanGozukara/Stable-Diffusion
🔗 SECourses Official Reddit - Stay Subscribed To Learn All The News and More ⤵️
▶️ https://www.reddit.com/r/SECourses/
I am currently looking for video to video lip synching workflow with MultiTalk
Updated Workflows
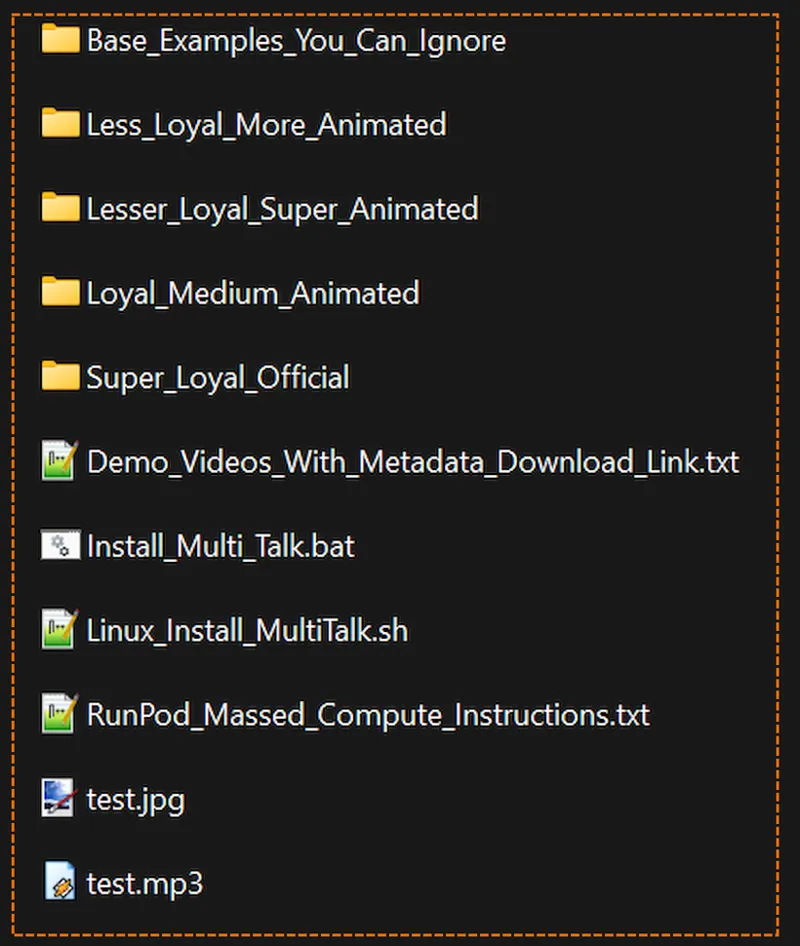
We have 4 different level of animation and loyalty
Each Folder has the following workflows including lower VRAM GPUs
Video Chapters (MultiTalk Levelled Up - Way Better Animation Compared to Before with New Workflows - Image to Video) : https://youtu.be/wgCtUeog41g
0:00 Introduction to the MultiTalk Tutorial
0:12 One-Click ComfyUI and MultiTalk Installation
0:29 Demonstration of MultiTalk's Singing Animation Capabilities
0:58 VRAM Requirements and Workflow Optimizations
1:12 Overview of the Tutorial Content
1:35 Improvements and New Workflow Options
1:52 How to Update and Use the New SwarmUI and MultiTalk Bundle
2:24 Exploring the New Workflow Presets in ComfyUI
3:08 Downloading and Using the Demo Videos with Embedded Workflows
3:36 Introduction to the New Video and Image Comparison Application
4:00 How to Use the Image Comparison Tool
4:33 How to Use the Video Comparison Tool
5:24 Advanced Upscaling and Comparison Demonstration
6:11 Final Remarks and Where to Find Installation Instructions
Video Chapters (MultiTalk Full Tutorial With 1-Click Installer - Make Talking and Singing Videos From Static Images) : https://youtu.be/8cMIwS9qo4M
By using MeiGen MultiTalk you can generate amazing fully animated real-like videos from given audio input. Not only talking but also animating the body movements is possible. In this video I will show you how to install ComfyUI on Windows and MultiTalk bundle and workflows we prepared with 1-click. Then I will show how to very easily generated amazing videos from these installed workflows. Moreover, I will show our favorite cloud private GPU provider Massed Compute. How to install same there and use it properly. Finally I will show everything on RunPod as well. So whether you are GPU poor or have good GPU, this tutorial covers everything.
0:00 Intro & MultiTalk Showcase
0:28 Singing Animation Showcase
0:57 Tutorial Structure Overview (Windows, Massed Compute, RunPod)
1:10 Windows - Step 1: Download & Extract the Main ZIP File
1:43 Windows - Prerequisites (Python, Git, CUDA, FFmpeg)
2:12 Windows - How to Perform a Fresh Installation (Deleting venv & custom_nodes)
2:42 Windows - Step 2: Running the Main ComfyUI Installer Script
4:24 Windows - Step 3: Installing MultiTalk Nodes & Dependencies
5:05 Windows - Step 4: Downloading Models with the Unified Downloader
6:18 Windows - Tip: Setting Custom Model Paths in ComfyUI
7:18 Windows - Step 5: Updating ComfyUI to the Latest Version
7:39 Windows - Step 6: Launching ComfyUI
7:53 Workflow Usage - Using the 480p 10-Second Workflow
8:07 Workflow Usage - Configuring Basic Parameters (Image, Audio, Resolution)
8:55 Workflow Usage - Optimizing Performance: 'Blocks to Swap' & GPU Monitoring
9:49 Workflow Usage - Crucial Step: Calculating & Setting the Number of Frames
10:48 Workflow Usage - First Generation: Running the 480p Workflow
12:01 Workflow Usage - Troubleshooting: How to Fix 'Out of VRAM' Errors
13:51 Workflow Usage - Introducing the High-Quality Long Context Workflow (720p)
14:09 Workflow Usage - Configuring the 720p 10-Step High-Quality Workflow
16:18 Workflow Usage - Selecting the Correct Model (GGUF) & Attention Mechanism
17:58 Workflow Usage - Improving Results by Changing the Seed
18:36 Workflow Usage - Side-by-Side Comparison: 480p vs 720p High-Quality
20:26 Workflow Usage - Behind the Scenes: How the Intro Videos Were Made
21:32 Part 2: Massed Compute Cloud GPU Tutorial
22:03 Massed Compute - Deploying a GPU Instance (H100)
23:40 Massed Compute - Setting Up the ThinLinc Client & Shared Folder
25:07 Massed Compute - Connecting to the Remote Machine via ThinLinc
26:06 Massed Compute - Transferring Files to the Instance
27:04 Massed Compute - Step 1: Installing ComfyUI
27:39 Massed Compute - Step 2: Installing MultiTalk Nodes
28:11 Massed Compute - Step 3: Downloading Models with Ultra-Fast Speed
30:22 Massed Compute - Step 4: Launching ComfyUI & First Generation
32:45 Massed Compute - Accessing the Remote ComfyUI from Your Local Browser
35:07 Massed Compute - Downloading Generated Videos to Your Local Computer
36:08 Massed Compute - Advanced: Integrating with the Pre-installed SwarmUI
38:06 Massed Compute - Crucial: How to Stop Billing by Deleting the Instance
38:33 Part 3: RunPod Cloud GPU Tutorial
39:29 RunPod - Deploying a Pod (Template, Disk Size, Ports)
40:39 RunPod - Connecting via JupyterLab & Uploading Files
41:11 RunPod - Step 1: Installing ComfyUI
42:32 RunPod - Step 2: Downloading Models
45:26 RunPod - Step 3: Installing MultiTalk Nodes
45:52 RunPod - Step 4: Launching ComfyUI & Connecting via Browser
47:50 RunPod - Running the High-Quality Workflow on the GPU
51:11 RunPod - Understanding the Generation Process on a High-VRAM GPU
52:34 RunPod - Downloading the Final Video to Your Local Machine
53:04 RunPod - How to Stop & Restart a Pod to Save Costs
MultiTalk: Bringing Avatars to Life with Lip-Sync
Complementing WAN 2.1 is MultiTalk, a specialized model for generating talking avatars from images and text or audio inputs. Available on platforms like fal.ai, it offers variants such as single-text for solo avatars, multi-text for conversations, and audio-based syncing. By converting text to speech and ensuring natural lip movements, MultiTalk addresses a key challenge in AI video: realistic dialogue delivery.
When paired with WAN 2.1 in ComfyUI workflows, MultiTalk achieves Veo 3-level lip-sync, enabling local AI video projects with enhanced expressiveness. This integration has been hailed for solving lip-sync issues that plagued earlier models, allowing creators to produce dynamic talking-head videos from static portraits. For instance, workflows turn three images into videos in minutes, ideal for animations or virtual influencers.
Comments (14)
Hello, is there any update for multitalk with Wan2.2? These workflows were fantastic, would be amazing if they got another upgrade! Please lmk if conversion to 2.2 is possible/easy.
No upgrade yet but i should check soon hopefully
I swapped in a WAN14BI2VFusionX 16 gb model to get away from the gguf and it still failed to generate a video with lip sync... Is multitalk just broken now overall? What are the options to get it working again? (Would only an older version of comfyUI work now? That wouldn't be great...)
well it works but you have to use installer. if you use latest node it is broken. sadly it is impossible to keep updating workflows since kijai constantly breaking older workflows. my installation working as in the tutorial video : https://youtu.be/8cMIwS9qo4M
[update - it appears there was an update that broke lora merging for wan in comfyui... This kills the WF entirely:/ is there a non-gguf version you have availbale? trying to get it to work but errors all over. I don't see a fusionx model that's not gguf to swap in... plz help! ] Did this break recently for anyone else? I'm starting to get a new error saying that you cannot merge LORAs with a gguf model (I was adding on more loras in the past, no issue)... I'm now turning off the toggle on lora loaders to not merge them, but the lip sync is still not happening at all... anyone know what happened? Or did a recent comfyUI update break it? Please lmk!
yes if you update nodes it will break. so make a seperate comfyui and use my node installer. it will work.
Can you make such a project for google colab ? Because on massedcompute you have to delete the project all the time not to be left without balance, and every time re-configuring it is not convenient.
google colab only paid one would work and i don't plan to cover it since maintaince is huge time for me
Hi Furkan, could you write a json preset for usage with 32gb system ram and 12gb vram? my system can only handle 32gb ram and with my 3060 12gb i always get a OOM error. i check process explorer and i can see that system ram is maxed out, and then it gives OOM error in comfyui workflow. any chance for optimization? i use your 480p low vram 6000mb preset, still error.
sadly there is no way to go lower. you can try Q4 GGUF. please let me know. also did you set 100 gb virtual ram?
Could you please share actual render times (seconds per second of output) on: RTX 3090 - 480p 10 second - 5 minute RTX 4090 RTX 5090 NVIDIA H100 Thanks for the awesome content!
thanks i will do if i can find time
What is the logic behind "loyal"? I don't understand. Does it mean it is less close to the original kijai workflow ?
loyal = original kijai and keeps the original image very alike. others may change original image for example like the face of the person