




Sew Edwardian Lingerie - Making Combination Undergarments
For today's 14 days of lingerie blog post, I thought I'd share with you a wonderful dressmaking lesson for making combination undergarments and petticoats.
This article was originally printed in The Designer magazine in February 1909. The author, though not credited on the page, was likely Katharine Clinton, author of previous installments of The Economics of Dressmaking series printed periodically in the magazine over the years.
The following article has been faithfully transcribed in its entirety by yours truly. Enjoy!
-----
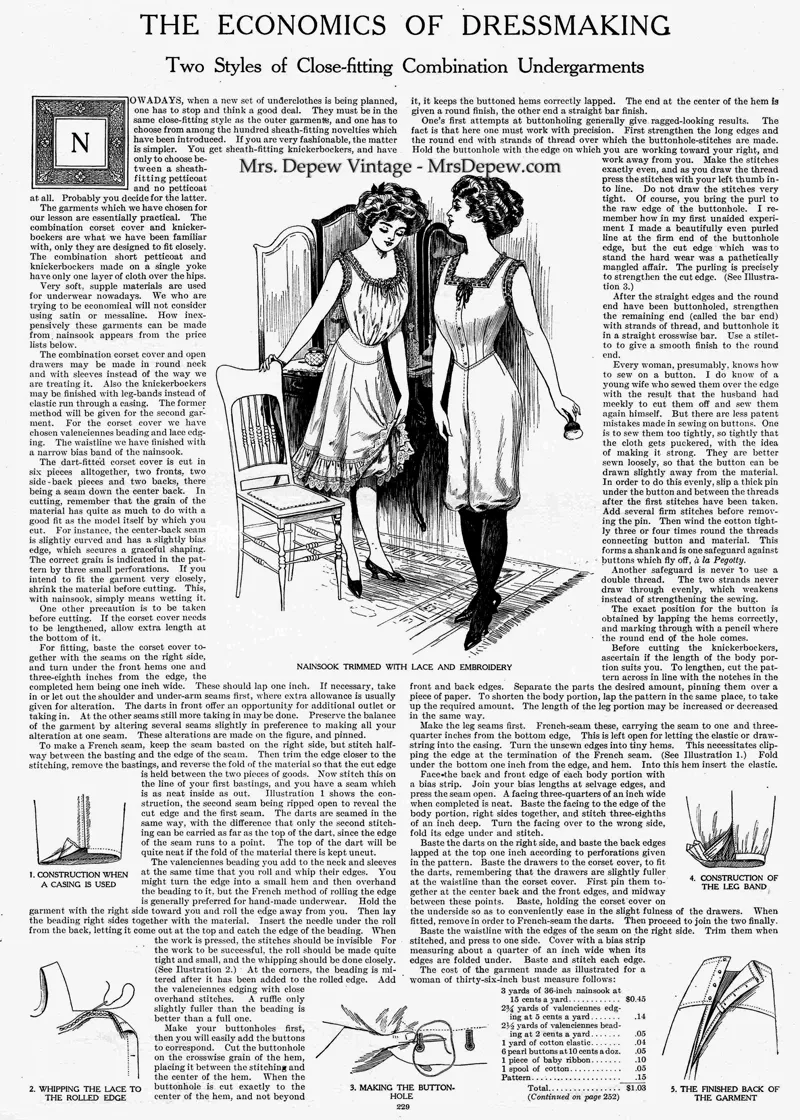
"THE ECONOMICS OF DRESSMAKING - Two Styles of Close-fitting Combination Undergarments.
NOWADAYS, when a new set of underclothes is being planned, one has to stop and think a good deal. They must be in the same close-fitting style as the outer garments, and one has to choose from among the hundred sheath-fitting novelties which have been introduced. If you are very fashionable, the matter is simpler. You get sheath-fitting knickerbockers, and have only to choose between a sheath-fitting petticoat and no petticoat at all. Probably you decide for the latter.
The garments which we have chosen for our lesson are essentially practical. The combination corset cover and knickerbockers are what we have been familiar with, only they are designed to fit closely. The combination short petticoat and knickerbockers made on a single yoke have only one layer of cloth over the hips.
Lingerie wardrobe circa 1895. Image courtesy of The Met.
Very soft, supple materials are used for underwear nowadays. We who are trying to be economical will not consider using satin or messaline. How inexpensively these garments can be made from nainsook appears from the price lists below.
The combination corset cover and open drawers may be made in round neck and with sleeves instead of the way we are treating it. Also the knickerbockers may be finished with leg-bands instead of elastic run through a casing. The former method will be given for the second garment. For the corset cover we have chosen Valenciennes beading and lace edging. The waistline we have finished with a narrow bias band of the nainsook.
The dart-fitted corset cover is cut in six pieces all together, two fronts, two side-back pieces and two backs, there being a seam down the center back. In cutting, remember that the grain of the material has quite as much to do with a good fit as the model itself by which you cut. For instance, the center-back seam is slightly curved and has a slightly bias edge, which secures a graceful shaping. The correct grain is indicated in the pattern by three small perforations. If you intend to fit the garment very closely, shrink the material before cutting. This, with nainsook, simply means wetting it.
One other precaution is to be taken before cutting. If the corset cover needs to be lengthened, allow extra length at the bottom of it.
For fitting, baste the corset cover together with the seams on the right side, and turn under the front hems one and three-eighth inches from the edge, the completed hem being one inch wide. These should lap one inch. If necessary, take in or let out the shoulder and under-arm seams first, where extra allowance is usually given for alteration. The darts in front offer an opportunity for additional outlet or taking in. At the other seams still more taking in may be done. Preserve the balance of the garment by altering several seams slightly in preference to making all your alteration at one seam. These alterations are made on the figure, and pinned.
To make a French seam, keep the seam basted on the right side, but stitch halfway between the basting and the edge of the seam. Then trim the edge closer to the stitching, remove the bastings, and reverse the fold of the material so that the cut edge is held between the two pieces of goods. Now stitch this on the line of your first bastings, and you have a seam which is as neat inside as out.
Illustration 1 shows the construction, the second seam being ripped open to reveal the cut edge and the first seam.
The darts are seamed in the same way, with the difference that only the second stitching can be carried as far as the top of the dart, since the edge of the seam runs to a point. The top of the dart will be quite neat if the fold of the material there is kept uncut.
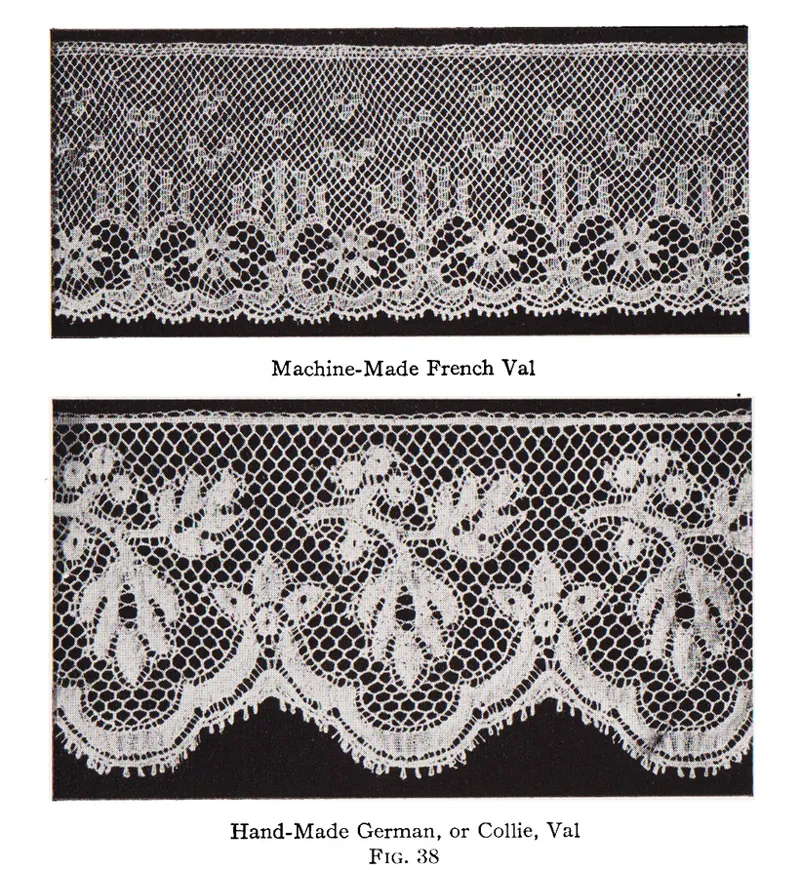
The Valenciennes beading you add to the neck and sleeves at the same time that you roll and whip their edges. You might turn the edge into a small hem and then overhand the beading to it, but the French method of rolling the edge is generally preferred for hand-made underwear.
French Val, or Valenciennes lace as pictured in the book Laces, Silks and Linens by the Woman's Institute.
Hold the garment with the right side toward you and roll the edge away from you. Then lay the beading right sides together with the material. Insert the needle under the roll from the back, letting it come out at the top and catch the edge of the beading. When the work is pressed, the stitches should be invisible. For the work to be successful, the roll should be made quite tight and small, and the whipping should be done closely.
(See Illustration 2.)
At the corners, the beading is mitered after it has been added to the rolled edge. Add the Valenciennes edging with close overhand stitches. A ruffle only slightly fuller than the beading is better than a full one.
Make your buttonholes first, then you will easily add the buttons to correspond. Cut the buttonhole on the crosswise grain of the hem, placing it between the stitching and the center of the hem. When the buttonhole is cut exactly to the center of the hem, and not beyond it, it keeps the buttoned hems correctly lapped. The end at the center of the hem is given a round finish, the other end a straight bar finish.
Lesson from Butterick's The Dressmaker, 1916.
One's first attempts at buttonholing generally give ragged-looking results. The fact is that here one must work with precision. First strengthen the long edges and the round end with strands of thread over which the buttonhole-stitches are made. Hold the buttonhole with the edge on which you are working toward your right, and work away from you. Make the stitches exactly even, and as you draw the thread press the stitches with your left thumb into line. Do not draw the stitches very tight. Of course, you bring the purl to the raw edge of the buttonhole. I remember how in my first unaided experiment I made a beautifully even purled line at the firm end of the buttonhole edge, but the cut edge which was to stand the hard wear was a pathetically mangled affair. The purling is precisely to strengthen the cut edge. (See Illustration 3.)
After the straight edges and the round end have been buttonholed, strengthen the remaining end (called the bar end) with strands of thread, and buttonhole it in a straight crosswise bar. Use a stiletto to give a smooth finish to the round end.
Every woman, presumably, knows how to sew on a button. I do know of a young wife who sewed them over the edge with the result that the husband had meekly to cut them off and sew them again himself. But there are less patent mistakes made in sewing on buttons. One is to sew them too tightly, so tightly that the cloth gets puckered, with the idea of making it strong. They are better sewn loosely, so that the button can be drawn slightly away from the material.
Lesson from Butterick's The Dressmaker, 1916.
In order to do this evenly, slip a thick pin under the button and between the threads after the first stitches have been taken.
Add several firm stitches before removing the pin. Then wind the cotton tightly three or four times round the threads connecting button and material. This forms a shank and is one safeguard against buttons which fly off à la Pegotty.
Another safeguard is never to use a double thread. The two strands never draw through evenly, which weakens instead of strengthening the sewing.
The exact position for the button is obtained by lapping the hems correctly, and marking through with a pencil where the round end of the hole comes. Before cutting the knickerbockers, ascertain if the length of the body portion suits you. To lengthen, cut the pattern across in line with the notches in the front and back edges. Separate the parts the desired amount, pinning them over a piece of paper. To shorten the body portion, lap the pattern in the same place, to take up the required amount. The length of the leg portion may be increased or decreased in the same way.
Standard Designer patterns are advertised in The Designer. 3640, 3637, & 3643.
Make the leg seams first. French-seam these, carrying the seam to one and three-quarter inches from the bottom edge, This is left open for letting the elastic or drawstring into the casing. Turn the unsewn edges into tiny hems. This necessitates clipping the edge at the termination of the French seam. (See Illustration 1.)
Fold under the bottom one inch from the edge, and hem. Into this hem insert the elastic. Face the back and front edge of each body portion with a bias strip. Join your bias lengths at selvage edges, and press the seam open. A facing three-quarters of an inch wide when completed is neat. Baste the facing to the edge of the body portion, right sides together, and stitch three-eighths of an inch deep. Turn the facing over to the wrong side, fold its edge under and stitch.
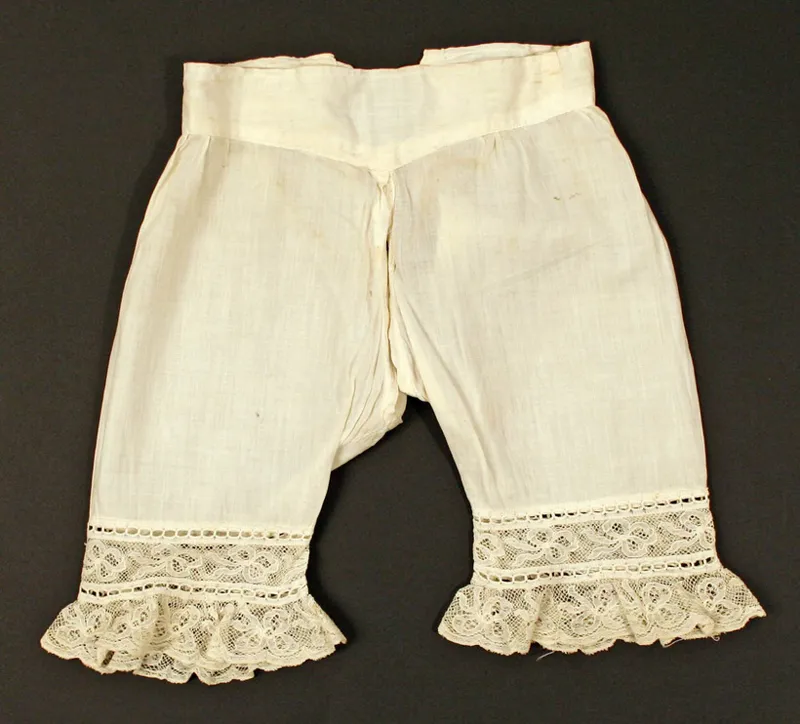
Drawers circa late 19th century. Image courtesy of The Met.
Baste the darts on the right side, and baste the back edges lapped at the top one inch according to perforations given in the pattern. Baste the drawers to the corset cover, to fit the darts, remembering that the drawers are slightly fuller at the waistline than the corset cover. First pin them together at the center back and the front edges, and midway between these points. Baste, holding the corset-cover on the underside so as to conveniently ease in the slight fulness of the drawers. When fitted, remove in order to French-seam the darts. Then proceed to join the two finally.
Baste the waistline with the edges of the seam on the right side. Trim them when stitched, and press to one side. Cover with a bias strip measuring about a quarter of an inch wide when its edges are folded under. Baste and stitch each edge.
The cost of the garment made as illustrated for a woman of thirty-six-inch bust measure follows:
3 yards of 36-inch nainsook at 15 cent-s a yard...$0.45
2¾ yards of Valenciennes edging at 5 cents a yard... .14
2½ yards of Valenciennes beading at 2 cents a yard... .05
1 yard of cotton elastic... .04
6 pearl buttons at 10 cents a doz ... .05
1 piece of baby ribbon... .10
1 spool of cotton... .05
Pattern... .15
Total... $1.03
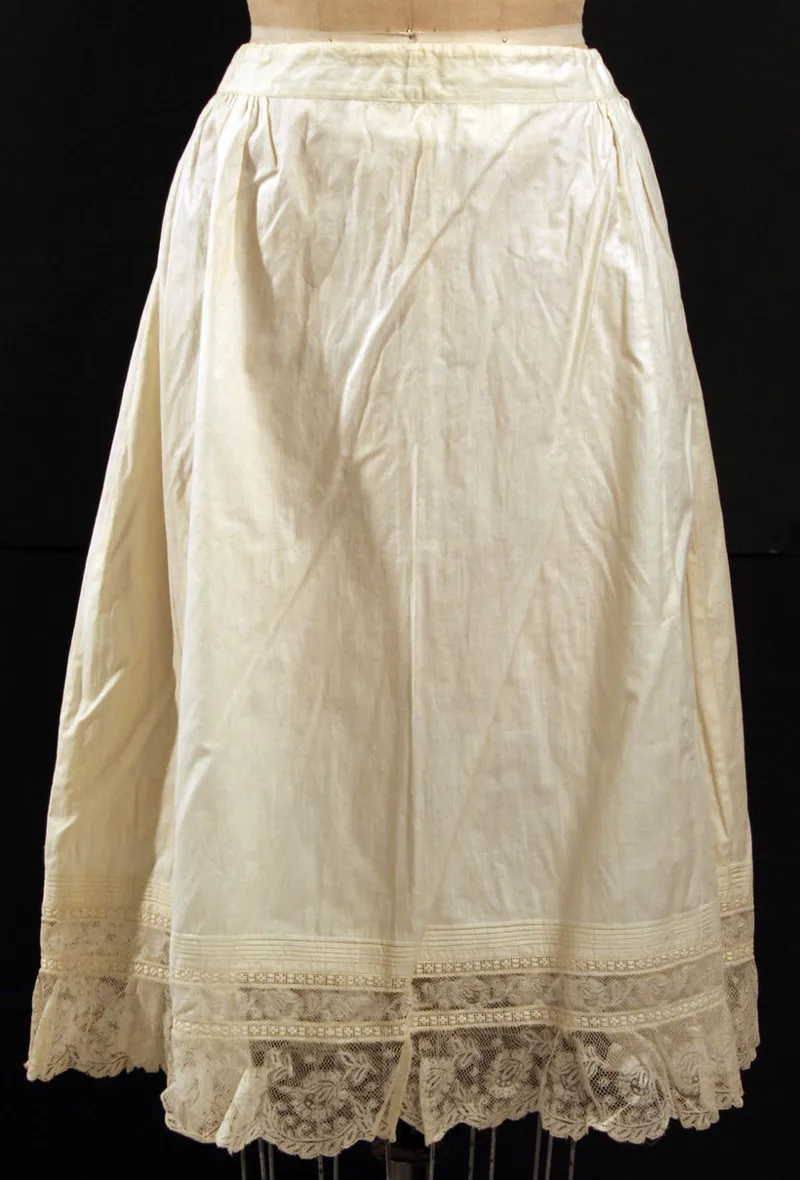
Petticoat. Image courtesy of The Met.
The second garment has a single circular yoke to which are sewn open knickerbockers and a petticoat made separately.
Cut the yoke on a lengthwise fold of the material at the center front. Fold its back edges to make completed hems one inch wide. These are intended to lap one inch. After the hems are made, face the top of the yoke with a bias width.
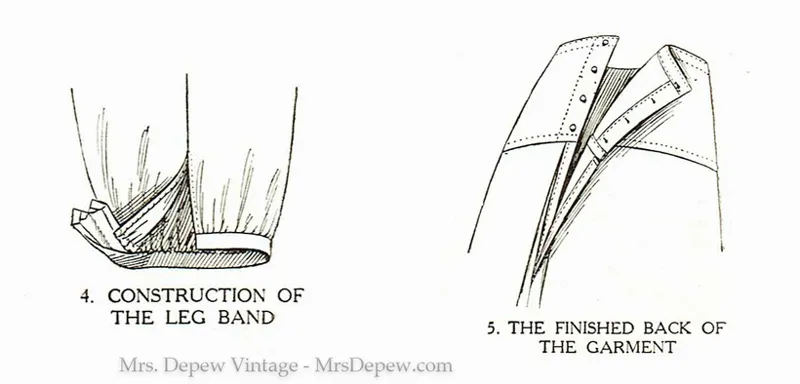
The knickerbockers are fuller than those shown on the other figure. This is permissible on drawers made on a yoke, where the fulness comes below the hips. The drawers are eased onto the yoke. Make the leg seams as described for the other garment, terminating them three and a half inches from the bottom. This opening is used when the leg-band is buttoned instead of elastic being used. Turn each edge into a small hem, clipping the edge as in the previously described knickerbockers. Baste the gathered edge to the leg-band, right sides together, making the band extend beyond the front edge of the opening as indicated in the pattern. This extension is designed to permit a buttonhole; when the band is stitched, fold and fell it over the raw edges. ln turning under the pointed edge of the extension, the edge will need to be clipped. (See Illustration 4.)
Face the edge of the body portion of each leg as previously described. Lap the front edges at the top one inch as indicated in the pattern, basting them together. The petticoat consists of three pieces. To make up as illustrated, cut off from the bottom of the pattern the amount allowed for a hem (two and three-eighth inches), and the depth which you intend to make your frill. Cut the front gore on a lengthwise fold of the material for the center front. Cut the front edges of the side gores on a straight length. Join with French seams, leaving an opening about six inches long at the top of the center back seam. Make each edge of the opening into a small hem. Fold the inverted plaits at the back one and a half inches deep at the top, basting them.
A pretty and inexpensive frill is made by edging a straight width, of the nainsook with a row of embroidery insertion and one of edging. Cut the even widths on the cross of the nainsook. No doubt you have yourself at some time thought it would be economical to utilize left-over lengthwise strips for frills. You can remember how badly they gathered, and how they stuck out stiffly. Lengthwise strips should be utilized for bands always, crosswise strips for frills. Allow for the frill half as much length again as the width of the petticoat. Join the embroideries and the nainsook with French seams. Those insertions which come with a plain portion on each side of the embroidered design are the least expensive, and are neatly French-seamed. Add a row of insertion to the bottom of the petticoat. Then add the frill, also using a French seam. The frill should be seamed at the -center back first. Then measure off into equal sections, measure the bottom of the petticoat similarly and pin corresponding points together before basting.
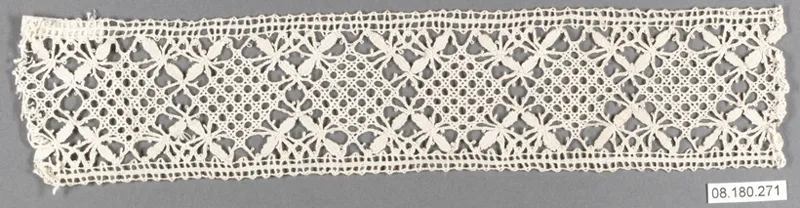
French insertion lace circa 1805. Image courtesy of The Met.
Arrange the upper edges of skirt and knickerbockers together. Pin the two together at the center front and at the back edges, making the back edges of the knickerbockers extend half an inch beyond those of the petticoat, for they must lap, while the petticoat edges just meet.
Baste with the petticoat on the underside to ease in the fulness of the drawers. Now baste these to the lower edge of the circular yoke, holding them right side together, and matching the back edges of drawers and yoke. The edges of the seam will come on the inside, which is better, since it will be a slightly thicker seam.
Sew in with it a narrow bias width of nainsook, laying it against the top of the drawers. Trim the edges, press them upward, and stitch the free edge of the bias strip over them. At the right-hand side you cannot stitch beyond the edge of the petticoat; for the yoke must be free to lap over the left side, while the edge of the drawers slips underneath. Clip the top of the drawers, therefore, to the seam, to turn the free edge at the top into a small hem. Then the strip of facing can be carried to the edge of the yoke. (See Illustration 5.)
The detailed cost follows. The quantities are those required for a woman of twenty-four-inch waist:
3¾ yds. of 36-inch nainsook at 15c. yd. ...$0.59
31/2 yds. of embroidery edging- at 5c. yd... .19
6 yds. of insertion at 5c. yd. ... .30
6 pearl buttons at 10c. a dozen... .05
1 spool of cotton... .05
Pattern... .15
Total $1.33"