




How to Sew Sleeves with Simplicity Designer Fashion 1969
Today I wanted to share the coolest little leaflet that Simplicity included with a Designer Fashion sewing pattern from 1969.
The included leaflet helped the home dressmaker add that "Designer touch" to their sewing projects!
"SLEEVE STORY:
Setting-in sleeves requires just a little extra time and know-how ... but the results are well worth it. A set-in sleeve should be without puckers, should curve smoothly over the shoulder and hang straight.
To Insure a Good Fit ...
Cut your pattern carefully ...well curved armhole edges will make sewing easier. Then carefully transfer the markings ( notches and dots) from the pattern to fabric. At the top of sleeve cut out the arrow as a notch.
Using a long machine-stitch, make two rows of ease stitching between the notches on sleeve ... one row on ¾" seam line ... the other row ¼ " from first row within the seam allowance.
Leave enough thread at ends to allow you to pull thread to form ease.
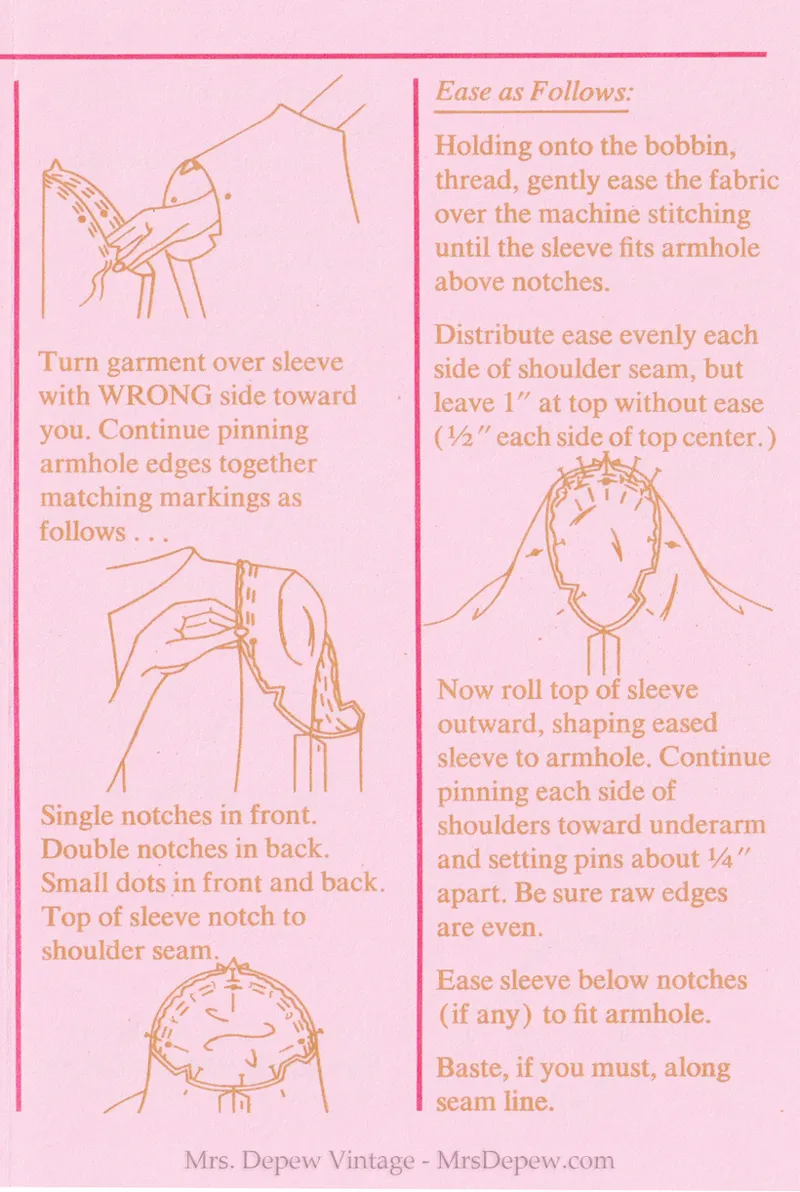
Stitch underarm seam and finish lower edge. Now Attach Sleeve to Armhole ...First, have sleeve and garment with RIGHT sides out. Then, reach thru armhole of garment from inside and
bring sleeve to garment with RIGHT sides together. Match and pin seams at underarm."
Single notches in front. Double notches in back. Small dots in front and back.
Top of sleeve notch to shoulder seam.
Ease as Follows:
Holding onto the bobbin, thread, gently ease the fabric over the machine stitching
until the sleeve fits armhole above notches. Distribute ease evenly each side of shoulder seam, but leave 1" at top without ease (½" each side of top center.)
Now roll top of sleeve outward, shaping eased sleeve to armhole. Continue pinning each side of shoulders toward underarm and setting pins about ¼" apart. Be sure raw edges are even. Ease sleeve below notches (if any) to fit armhole.
Baste, if you must, along seam line."
And Finish ...
Trimming the armhole seam is a delicate subject. The opinions vary greatly ... All agree to trim seam close to second stitching at underarm below notches. The seam above the notches may be:
a-Untrimmed, particularly in coats and jackets, where it acts as padding in these un-padded days.
b-Trimmed to ¾" for dresses and blouses.
c-Trimmed to a scant ¼" for sheer fabrics. Working from the inside, lightly and gently, steam press the seam above notches to shrink out ease. Then turn seam toward sleeve.
I hope you found this as nifty as I did!
I have attached the leaflet as a PDF to this post for you so you can save it for later reference.
Happy sewing!