
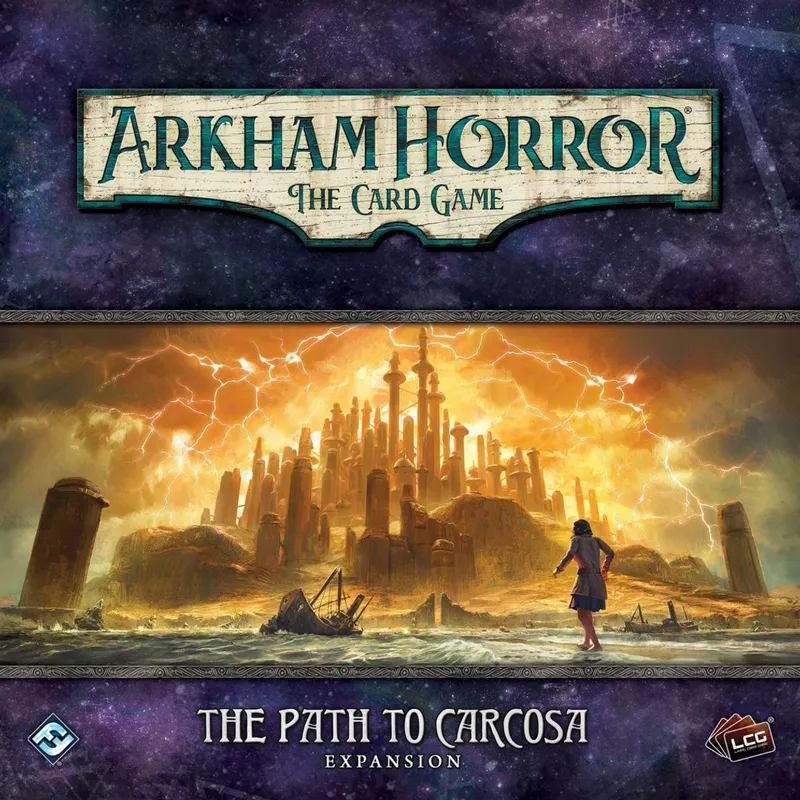







A Review of The Path to Carcosa | Arkham Horror: The Card Game
In 1895 F. Tennyson Neely published a collection of short stories written by Robert W. Chambers, this book is titled “The King in Yellow” and it is named for the fictional play within the book that runs through the first four stories, connecting them together along with the presence of the titular King in Yellow and the Yellow Sign. An interesting element of this is that the names of Carcosa and Hastur (the King in Yellow) originated from the short story “An Inhabitant of Carcosa” by Ambrose Bierce. (The King in Yellow and An Inhabitant of Carcosa are both lovely reads that don't take too long).
Chamber's book was read by Lovecraft and it inspired HP enough to include elements from The King in Yellow in his own novella “The Whisperer in Darkness” (1931) and it is those references in addition to August Derleth's writing that cemented the inclusion of Hastur and Carcosa as a part of the Cthulhu Mythos.
Hastur's depiction tends to be a vast octopoid entity wearing yellow robes, known in this form as the King in Yellow, a Great Old One spawned by Yog-Sothoth (and half brother to Cthulhu, thank you August Derleth). The Avatar of the King in Yellow has great affinity with creative types, painters and writers in particular and it is this connection that Path to Carcosa explores both with its Investigators and its campaign story. Lead designer M.J. Newman writes in her Design Notes for the campaign that one of the elements of The King in Yellow that she wanted to bring across into the campaign is the concept of the “unreliable narrator” which is quite a challenging thing to do in games as it requires the players to step into that role.
The way that this is achieved in Path to Carcosa is via a few elements, the first of these is the written prose; it is crafted in a way that can be read in multiple different ways depending on your perspective. Are the events of the scenario happening in the surface level? Did the theatre fall to the actions of cultists or was it all a delusion? The second two elements are supported with mechanics called Conviction and Doubt. This system is how the game creates branching paths where the scenario names remain the same, but the content of the scenario mechanics (Agenda and Act decks) are changed. Many of these changes sit in the back half of the campaign, so initially players are moving down what seems like a set route without the choice/options that the start of Dunwich has, but is in fact a shifting, moving journey that will in the end determine the entire resolution of the campaign's story.
Before we move onto the scenario breakdown I do want to briefly explain the other main new mechanics that are included in Path to Carcosa. The first of these are Story Cards, these are scenario based cards that have text on the back. This text is read only when the players are instructed to do so, this provides extra places where the story can take surprising twists and turns without relying on just the act/agenda and campaign guide. Story Cards become something of a staple at this point, with them reappearing in future campaigns.
The other mechanic is Hidden Cards, this is one that only really shines when playing with other players. Hidden cards are encounters that, when drawn by a player, go into their hand. These cards also have Peril meaning that the player who has drawn them cannot discuss, reveal or ask for input on the card in hand. Each of these cards cannot be discarded normally, so they eat up hand space for investigators, instead they are discarded by the player performing some specific action. They not only cause problems for the players, but they also do a good job of expressing Hastur's creeping influence or alternatively the deteriorating mental state of the investigators compelling them to do actions that might be harmful. It is a lot of fun to see someone else at the table draw their encounter card and then silently place it into their hand where it sits menacingly.
It is not without good reason that Path to Carcosa tops most people's lists for the best campaign in Arkham Horror and this subtle addition of multiple paths that provide players with the tools to navigate to their desired destination (even if it is unknowingly in the first play through) that helps make this one of the greats. But of course, good writing and multiple choice options does not alone make for a great campaign game, a lot also rests on the individual scenarios, so let us go through them.
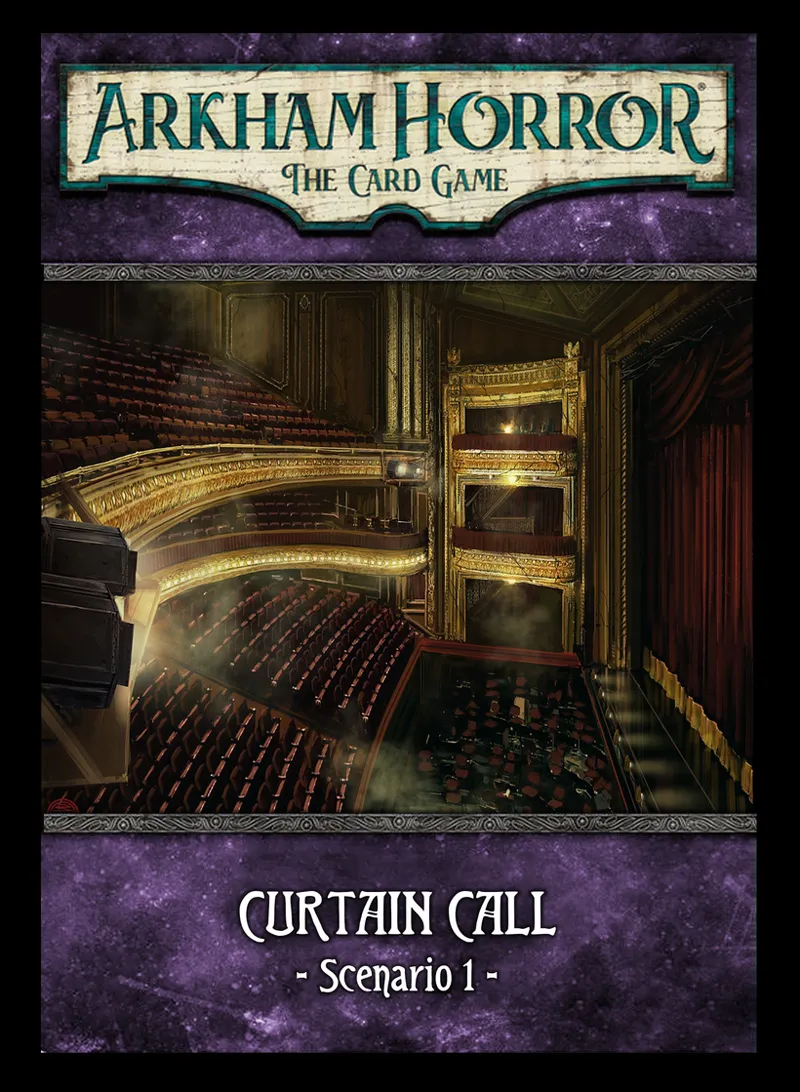
The first scenario; Curtain Call, is the beginning of a trend where initial scenarios in Arkham Horror campaigns are often brutal and a little too over tuned in places, especially for a blind first time play. The way that the map is set up; with it divided in two halves, with the “before the theatre” locations on one side and the backstage ones on the other, is the first element that causes this friction. That is because the stage of the Ward Theatre is the choke point between the two halves and eventually a reoccurring hunter enemy is going to turn up for its time in the spotlight. That in itself is not the main thing that can make plays of this scenario a bit frustrating, in fact without the “Return to..” box the Royal Emissary (Or Stupid Bagpipe Baby as we've ended up calling it) can be a threat that's dealt with repeatedly very easily.
The more frustrating element is the way that the front and backstage areas are designed, in each zone there will be three face down mystery locations that you have no idea what will be in there until you enter. This means sometimes you walk into a room blind only to discover there's nothing for you to do there and then have to backtrack before entering another room. At lower player counts the loss of these actions can be quite harsh because backtracking is extra punishing when you have less actions overall to explore. I love the thematics of this, especially backstage where unless you're an actor like Lola or Andre you would have no idea what the rooms would be, so it can be fun as long as chance isn't giving you a repeated set of bum deals. In fact, while I'm on it, the atmosphere of this scenario is incredible. With a thick heavy string of mysteries surrounding the play setting the scene (and foreshadowing some things) before your investigators drop off into sleep after the first act concludes, waking up to a foul smelling, empty theatre with corpses instead of patrons. It's excellent.
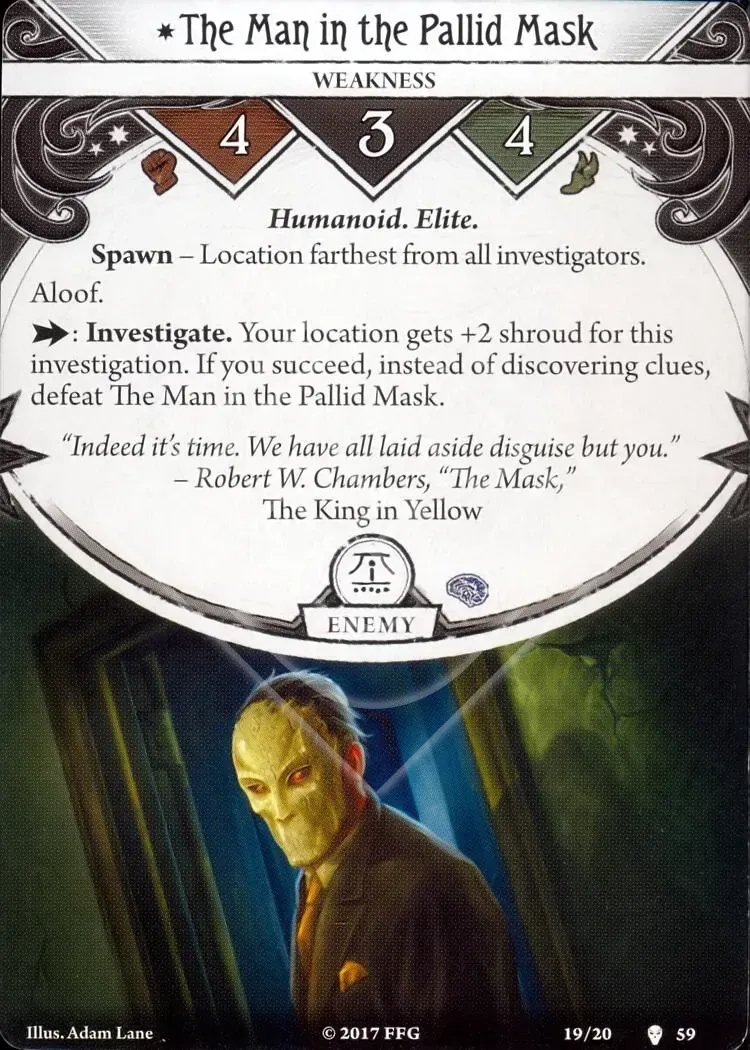
As the scenario unfolds, the primary antagonist of Path to Carcosa makes his debut appearance; listed only as “The Stranger” in the cast billing, this character known as “The Man in the Pallid Mask” will appear time and time again thanks to it being shuffled into one of the survivor's decks upon completion of this scenario. During Curtain Call the goal is to chase after The Stranger after he first appears in a random location and then later moves into the Lobby. One of the main ways I play this part of the game is by staying in the Backstage area at first in order to try and force The Stranger's random room to be one of the ones connected to the Lobby, or if it does turn up Backstage, I'm already nearby to shorten the chase. This is why I mentioned the scenario layout before hand, the theatre choke point is a neat idea, but when you combine it with how The Stranger makes his first appearance it starts to be a little awkward.
A part of this scenario I really like is what happens once The Stranger has moved to the Lobby and the final Act begins and this has multiple different versions of weirdness that start to overtake the theatre. It could catch fire, start to flood, get filled with ooze, mist, entangled overgrowth, or become overwhelmed by The Stranger's weird screeching (There are three options in the main campaign and the Return to... box adds three more options to this part of the scenario). This is the kind of variation I enjoy, each different Act II side b offers a different problem for the players to deal with as they race to the lobby.
Overall, despite being a bit of a rough landing at times the thematics and atmosphere of this one win me over and when I'm not on the unfortunate end of probability I tend to have a good time despite my gripes over the map and deployment of The Stranger. It's is one of the best opening scenarios in the game.
The Last King is our second scenario and it is another one of my all time favourite scenarios. It has a tight map that represents rooms in a house where a post show party is taking place, this is already quite a jarring moment because you've just been through this harrowing experience in the theatre, but the after show party is going on as if everything was normal. The Last King is a place where the unreliable narrator really shines, depending on your perspective this could easily be a perfectly normal party, a place filled with vile cultists or a distortion filled with hallucinations. Player choices and actions are entirely what will determine the truth of the scenario and that is a wonderful element.
Initial set up has five bystanders spread around the five non-starting rooms with clues placed on them to represent evidence one can learn. How one interacts with each of the bystanders varies depending on who they are and the information you can learn from them is printed on the back of each one. This information provides mechanical benefits in later scenarios so we are encouraged to speak with everyone to learn as much as possible. One of the neat parts of this scenario is that you can leave whenever you feel like, that's why it can just be a normal party with nothing sinister going on at all. If that was your experience, then that's what happened. Also each room has its own elements to interact with, each of which has thematic mechanics appropriate to the place.
The longer you dally in this house, the more disturbing things will become, with a series of “Sickening Reality” cards drawn from under the scenario card transforming each of the bystanders into horrifying monsters. I do want to briefly note that in the original release these people were listed as being “insane” but the re-release changed that to “possessed” which is just an excellent change as what happens to them and several other cards have similar changes. This was done to better represent the story and also avoid “harmful and incorrect stereotypes regarding mental illness” (as per Maxine's own Discord message on the matter). I personally appreciate this change not just to address harmful stereotypes, but also due to how it improves the narrative of the campaign. Having these enemies be the ones who are seen to be possessed while the reality of what the player characters are seeing brings home the entire “is this what's really happening?” interpretation of the story very well. The non-player characters one who's mental state we should be questioning, not the others.
Again the atmosphere here is just impeccable, with the written descriptions and artwork working together to create a setting that feels a bit off from the start and then spirals into horror and decay as time progresses. I also appreciate the design of the map, it is small, but there's enough space to keep away from the first and second possessed enemies for a while which is a testament to how well the layout is designed.
One slight note, I personally prefer the “Return to...” version of The Last King because of how it handles the final guest of the party, Dianne Devine. She's an aloof enemy in the original version, meaning she both automatically takes the position of an antagonist and tilts the story of the scenario more towards the “reality” being that the Cult of the Yellow Sign is real and dangerous. The “Return to...” version has her not be a viable target for attacking unless she's shifted to possessed form. I do find it frustrating that the deluxe reprints of the campaigns which came out over the past few years did not include the Return to content because of things like this, some of the Return to..
After the conclusion of the party there is an interesting decision to be made during Interlude I, the players can choose to return secretly and listen in on a meeting, burn the place to the ground or simply flee without learning more. This is the place where the Doubt, Conviction and Neither, routes start to offer themselves to the players. As mentioned above this is the core mechanic that focuses around the unreliable narrator element of this story and provides the branching paths that change scenarios dependant on where you are with your Doubt and Conviction levels.
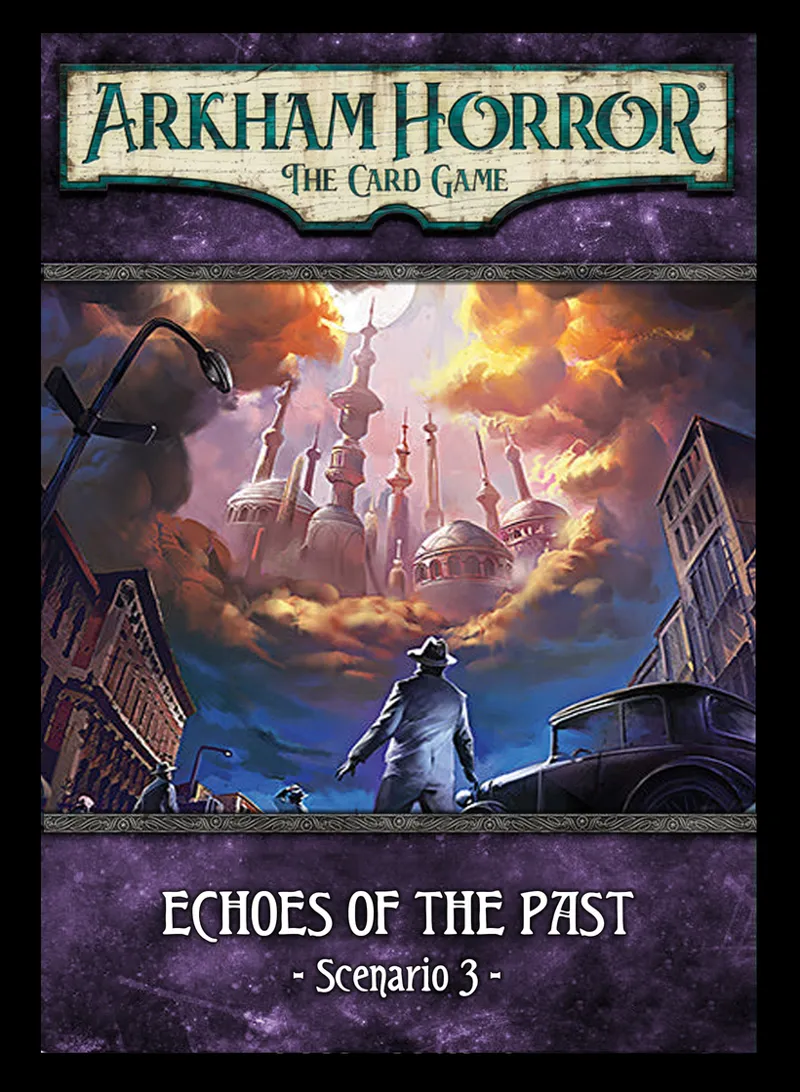
Echoes of the Past is Arkham Horror's second attempt at “searching a location filled with old things” scenario, the first being the inconsistent and at times frustrating “Miskatonic University” from The Dunwich Legacy. Here our investigators, not long after the events of the Party, have decided to head over to the Arkham Historical Society in Southside and search the records for any information about the productions of The King in Yellow.
The Historical Society is a three floor (four floors if you have “Return to...”) building that has a centre set of connected hallways that one moves up and down, flanked with a single location on each side. This simulates the building design quite well while also providing choke points that both the players and enemies can take advantage of.
For my tastes it is the Return to... version of this map that works best, the 3x3 grid doesn't work as well as the 3x4 one both from a mechanical standpoint and a thematic one. Rummaging through the basement is such a great fit for what is happening here and the map being slightly taller makes for the secret corridors (once they have been discovered) to be even more meaningful.
In particular I love the way the mechanics in this scenario are designed to represent both the investigators and the Yellow Sign cultists frantically searching through the place, with player progress being via clues as normal and the cultists progressing by generating doom. This scenario also has a far better balance for fighters and cluevers when compared to this scenario's museum predecessor. There are enough cultists here to provide threats that both have to be hunted down and stopped from hunting the investigators who are searching the archives. It feels like a movie set piece with some characters hurriedly searching through documents while others hold off the antagonists and try to keep them from finding it first. It's a real Indiana Jones, early stages of the movie feeling where everything is a race to find out the information first.
When the Act has been advanced enough the players get access to Mr. Peabody, a temporary ally who shows them the aforementioned secret corridors, opening up the map further for both sides. The hunter cultists become even more of a threat now because they are able to threaten the clue gatherers from more directions than just the central hallways. This scenario also brings even more story and branching paths with three different success routes, two of these surround an artefact called the Clasp of Black Onyx (if you take it or leave it behind) with taking the Onyx moving towards Conviction while leaving it behind resulting in progression towards Doubt. The third success route is the Conviction/Doubt neutral one and it's actually buried inside the Agenda deck. If the agenda deck advances past the second part the Possessed Oathspeaker arrives (along with Sebastian Moreau from The Last King if he wasn't slain there) and defeating this enemy results in both another ending and also gaining The Tattered Cloak body asset from their body.
No matter which of the conclusions of this scenario are achieved, the breadcrumb trail leads to a man called Daniel Chesterfield, who is the sole survivor of the previous production of The King in Yellow. His mind has crumbled away and broke from the experience and he is now in Arkham Asylum (the place that Batman's own Arkham Asylum is named after), so the investigators head there for The Unspeakable Oath.
The Unspeakable Oath (Oath) has an interesting scenario layout that creates a lot of awkward movement, this helps make the place feel a little disorientating and labyrinthine in a way that evokes the feel of the theatre in Curtain Call without completely replicating it. It's hard for me to be able to accurately put my finger on why I feel this scenario echoes the first one, but it might be because the basement cell exploration system reminds me a bit of the backstage rooms system. It's a classic one where all of the locations have identical backs and you're playing a shell game to find the right one. You're also encouraged to do stuff in the other cells also in order to generate victory for experience and as a part of the escape plan.
The asylum starts out relatively calm, with the investigators being allowed inside and left to their own devices. Which in itself is a bit odd. One would expect them to be escorted to see Doctor Mintz in order to request a meeting with Daniel, but instead they're pretty much left to their own devices and decide to gain access to the basement cells by getting the keys from a nurse (by theft, threat, charm or violence). In addition to needing the basement key, the cells themselves require clues to enter so this second act of the scenario involves a lot of clue gathering, but there are plenty of other things the fighters can do while waiting even if there are no enemies to fight because an escape plan needs to be set up.
When Daniel is found the condition he is in is directly linked to the previous scenario, if you have the Onyx clasp then Daniel is found to be alive and able to explain how the crew was made by Nigel Engram to speak Hastur's name and allow the influence of the Yellow King into them. If the Onyx clasp was not collected then it is too late for Daniel as Hastur is able to use him like a puppet. The Return to... adds two more potential options into the mix, with Daniel raving before being devoured by a monstrous abomination or alternatively mentally damaged by a “Radical Treatment” delivered by the monstrous abomination that is Doctor Mintz and his barbaric methods.
The agenda design is also worth mentioning here, at the start of the scenario the enemies are set aside, grouped either by their possessed tag or their monster one. The completion of the first agenda has the possessed humans get shuffled into the encounter deck and the monsters are gradually set up underneath the act deck. The completion of the second act has the monsters start to appear, representing either Hastur's minions breaking through into reality, or the minds of the investigators starting to hallucinate these creatures. If she was left alive, Constant Dumaine also appears at this point in the Garden as the second reoccurring enemy from the Last King.
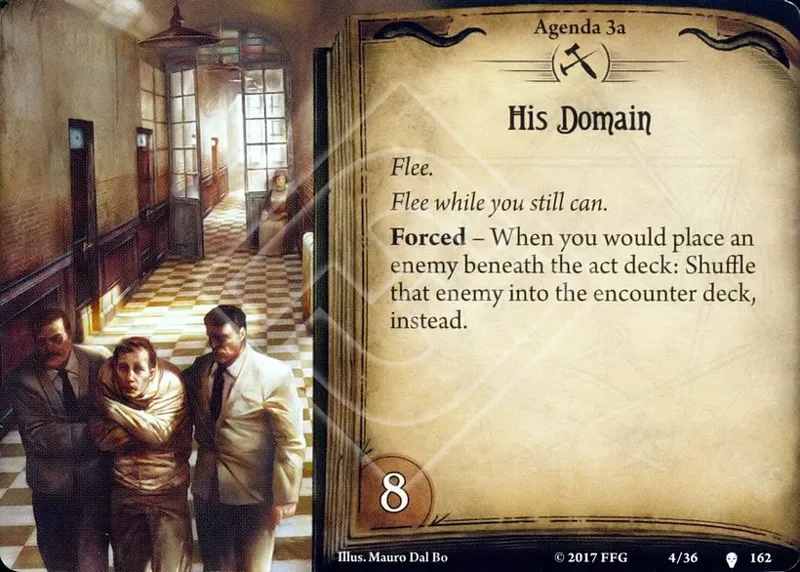
"His Domain" is the third agenda and I think it is one of my favourite agenda cards in the game for pure atmosphere, it's an ominous warning that's ambiguous enough to be interpreted as either the genuine threat of Hastur's impending arrival or the fraying of the investigators sanity.
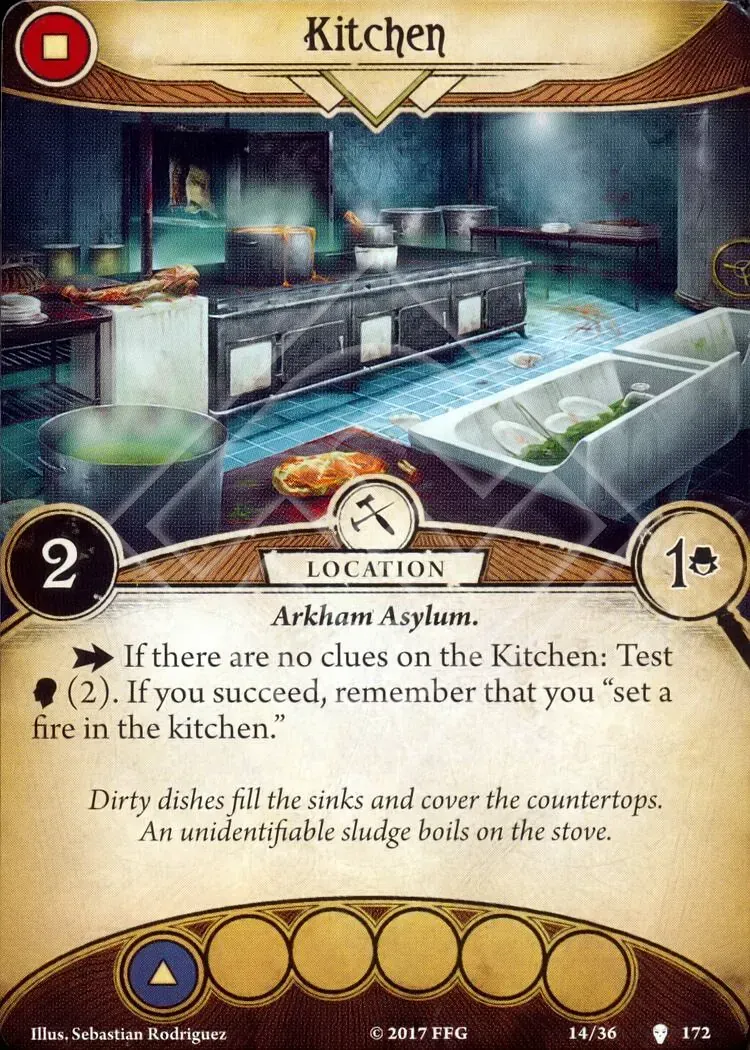
Leaving this scenario before the completion of the Agenda requires the execution of “the plan” as I mentioned earlier, there are several places where the investigators can act out and cause chaos. A fire can be set in the kitchen, a fight incited in the garden or a dangerous patient released. These are things that the non-clue gatherers can work on during quiet periods, though in some cases they do need the clues gathered up from the location before they can work their own magic. There's a real sense of the asylum working up into a state of chaos and mayhem and these actions help have the investigators feel a part of that.
The completion of this scenario has a very nasty surprise for any investigators that are defeated. They are automatically driven Insane, which removes that character from the campaign permanently, forcing the player to pick a new investigator and if all players are defeated then the campaign ends right there. Once you get over the initial shock of this it is a deeply thematic moment, the players are in an asylum and they are either broken people hallucinating a terror from beyond the stars, or Hastur himself has arrived and broken them in the way that Daniel can be broken. No matter which of these is the truth, Doctor Mintz is a terrible person who inflicts an awful procedure on people in this kind of state. It's one of the bleakest moments in Arkham Horror because this is a real thing that happened to real people, it's not cultists, abominations from another dimension, xenophobic fish-men or a shadowy SCP style cabal of crimson fashionistas. This is something that awful, ignorant men did because they thought they new best and were willing to inflict pain, suffering and permanent damage on the vulnerable. It's horror and dread of the worst kind, the evil that humans inflict on other living beings instead of protecting them.
After this halfway point the story reaches a second interlude in Lost Soul and here we continue to build on the Doubt/Conviction paths that we have chosen to walk down (or avoid entirely). There's an incredibly fun mechanic that can come about if Daniel's warning about speaking Hastur's name is believed. If you “heed Daniel's warning” then speaking the name Hastur causes an immediate 1 horror. This creates such a fun environment where players police each other while also using euphemisms like “Him”, “The Yellow King” , “The Unspeakable One” and so on. It helps lean further into the pseudo roleplaying experience that good Arkham Horror campaigns can evoke in players. You can really engage with the narrative here beyond just the emergent storytelling of the scenario itself. There's also a second fun element to this, where mechanics that play around with taking horror like Agnes Baker's direct damage via horror or Calvin Wright's increasing power the closer he is to death being able to utilise and even abuse this. It's not just a call back to The King in Yellow book, it really feels like a part of the world and the fact that if you ignore Daniel you don't suffer this mechanic at all. There's no power over you unless you let there be.
Scenario 5 A Phantom of Truth picks up several months after the previous scenarios, this makes the gap between scenario 4 and 5 an ideal narrative spot to play side missions set in Arkham Country such as Murder at the Excelsior Hotel, The Midwinter Gala and many of the Investigator based Challenge scenarios because apart from Monterey Jack's scenario they're all based in and around Arkham or Innsmouth. It is true that you don't need these extra scenarios to fit into the narrative, but having them slot into place does feel satisfying.
The scenario itself starts with a “choose your own adventure” style short story that has players navigating through a vivid dream that again can be interpreted in many ways. Your decisions along the way, including how many times you went after The Stranger bare fruit here and there is also a fun and interesting fourth wall moment where both the investigators and the players are asked how they are finding “the second act so far”. I quite like this section as it's very efficient with its words, we get the dreamlike feel without having to read multiple paragraphs per entry.
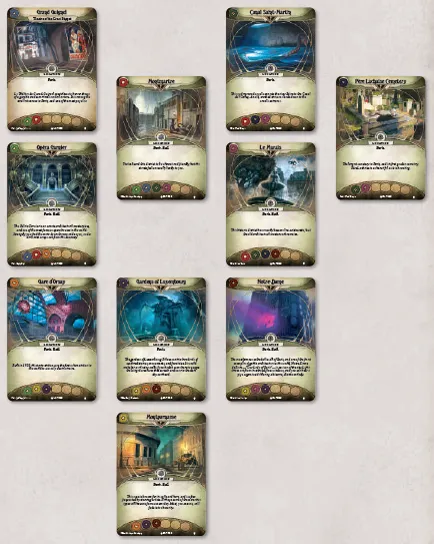
The scenario itself takes place in Paris, with the investigators chasing down the man that their dreams crystallised around, the director of The King in Yellow, Nigel Engram. This scenario takes place over one to three nights (each represented by the Agenda deck) and has the players dealing with an enigmatic enemy called The Organist. The Organist's role in the scenario depends on the Doubt/Conviction path that you are on, if Doubt is more or equal to Conviction then the investigators are hunting after The Organist and attempting to place clues on them through combat. If Conviction is higher then The Organist is instead hunting after the investigators and the goal becomes avoiding an unkillable enemy.
I think if any, this is probably my least favourite scenario because it tends to devolve into a game of chase around the circle, with The Organist being the main player and Byakhee taking supporting roles. It does feel a bit better when you're going after The Organist rather than kiting them around the Parisian streets, but either way it does feel kind of directionless. This may be by design, as The Organist seems to be a bit of distraction to try and keep the investigators away from Nigel. As for Nigel himself, you can fail to find him, find him long dead in his home or if you intruded upon the secret meeting back in the interlude after The Last King he can even turn out to be alive, at least you think he is, but soon the illusion shatters and the truth is that he is again long dead and The Tattered King of Carcosa has once again been messing with the investigators (or perhaps it's all in their heads).
Paris remains the setting for the next scenario in The Pallid Mask with it taking place inside the deep, twisting paths of the famous Catacombs of Paris. These are an underground ossuary under the City of Lights that were created around the turn of the 19th century to help solve the problem of overflowing cemeteries in the city. Path to Carcosa's rendition of this place is one of the closest points that Arkham Horror has got to its dungeon crawling roots (you can trace Arkham Horror LCG's lineage back to the Warhammer Quest Adventure Card Game and from there it is a direct line to Warhammer Quest which leads to HeroQuest and then Dungeons & Dragons).
This dungeon works by simple adjacency, cards are placed in a grid form next to each other with orthogonal directions providing connections. The back of each catacombs card is the same and the set up for this dungeon even leans on Warhammer Quest's own dungeon deck set up with the destination location of Tomb of Shadows shuffled in with the Blocked Passage and three other random cards. That then forms the bottom of the catacombs deck, with the top half being the remaining catacombs location cards randomised on top. You know that you'll need to travel a minimum of 6 locations in order to reach your destination, but it could be as many as 10 so lingering around is not a good option.
The goal here is to find The Man in the Pallid Mask and as such they are now removed from the deck of the player who had them. There are a few other specific variations on the start location, depending on how the previous scenario went, but for the most part it's pretty straight forward. Exploration is also very relatively simple, the locations you enter are going to tell you where the next locations are placed and outside of a dead end you know you're always progressing towards your destination.
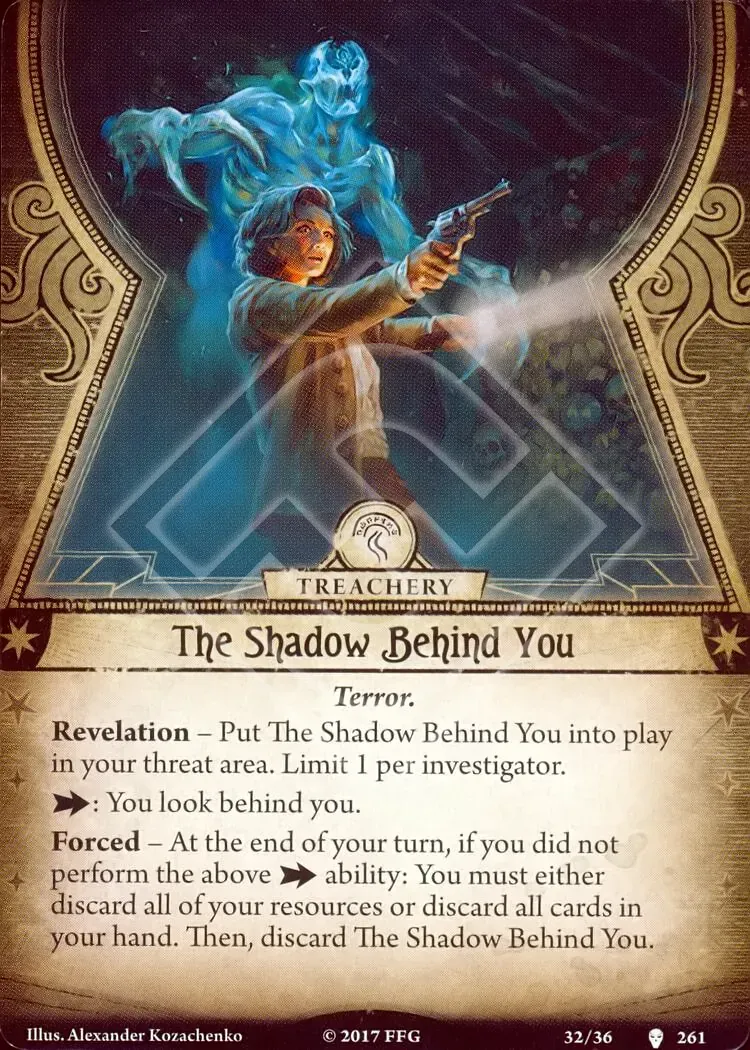
The enemies in this place consist of Ghosts & Ghouls plus some possessed Docents having the time of their life inspecting the bones, at least until a horrible fate claims them. The hazards of this environment outside of the living and dead alike include pits, eyes watching from the skulls in the walls and this really fun card.
It is just an action sink that can put you in a bad spot, but I cannot help but love the overall design and mood of this one.
As for the Return to... changes, they mostly add variety to the locations for future playthroughs, with 4 new cards being added and then 4 cards (apart from the mission critical passage and tomb) being removed at random. The main addition is the malformed skeleton, which can turn up randomly or rise up from the new “Mound of Bones” location. It is not a beefy enemy, but it is fast and can deal either 3 damage or 3 horror when it attacks. It's a welcome addition that functions somewhat as a second mini-boss in addition to the surprise mini-boss who materialises out of the Agenda deck. The returning Guest in this scenario is Ishimaru Haruko, who I think has one of the most gripping and unnerving pieces of artwork out of all the guests. Her elongated spine and exposed bone matter make her fit right in here, as if she's foreshadowing the catacombs all the way back in The Last King. Unfortunately most of the other guests do not have as tight a connection to their reappearance as Ishimaru does. I do think it would have added another layer to the narrative if each of them had some aspects of the scenario they later reoccur in.
When the Tomb of Shadows is located, The Man in the Pallid Mask is spawned there and the goal now depends on how the investigators deal with their constant companion. If the answer is “violence” then the Conviction grows and the investigators now need to find their own way out via “The Gate to Hell” if clues is the chosen method then Doubt increases and the goal now is to find the Blocked Passage.
The resolution of this scenario goes in one of three ways, but there are no major narrative beats except for in the failure resolution which forces at least one investigator to read the second act of The King in Yellow, giving the reader(s) an additional Madness/Pact weakness in their deck and rewarding them with 2 additional experience.
I think this scenario has mechanics and thematics that are solid and engaging. I certainly enjoy it a lot more than its predecessor, but it is just lacking that final thing to elevate it to the top tier. There's a solid dungeon crawler in here, but a single scenario of this length isn't enough to fully realise what it could be.
The penultimate scenario is Black Stars Rise, which takes place off the north-west coast of France on the causeway island of Mont Saint-Michel. I grew up in a village which has an island with a causeway that appears at low tide, so this scenario is just a little bit more evocative for me than it would be otherwise (I've also been to Mont Saint-Michel when I was a young un and I hope to return at least once more in my life).
Our battered investigators are seeking out the place that Ashleigh Clarke sang about during The Last King, here they need to discover the way to Aldebaran where Dim Carcosa waits. The twist in this scenario is that there is no act deck, only two agendas. One of which will lead the way to the Palace of the King and the other which brings about the end. This creates a delicate path where we're first asked to push both agendas forward and we have to decide if we want to keep them advancing together at the same rate, thereby reducing the total time we have in the scenario or gamble and push one forward first and take the 50/50 that we've made the right pick from the start. I generally prefer working on both, but there is a rush if you decide to rush just one of them and get it right.
Our ultimate goal will always be in or around the Abbey of Mont-Saint-Michel with the investigators either diving into the churning water from the Chapel of Saint Aubert or leaping from a tower into a whirling maelstrom. Initially we're locked off from getting to the chapel as there are certain goals that must be achieved first.
This scenario is a bit of a frantic flail around initially, with a scramble to gain clues and try to advance the agenda that might be correct, if we advance the wrong one then Ashleigh Clarke will appear back at the start and the Beast of Alderbaran will appear at the location we need to clear for passage.
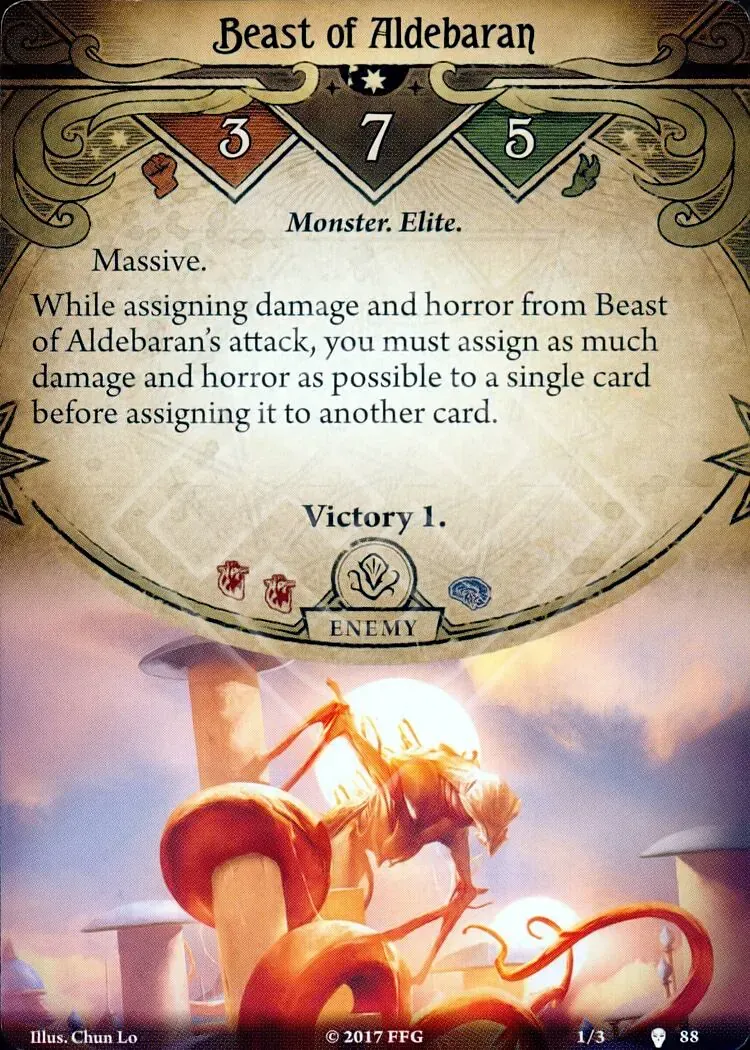
Ashley isn't that much of a threat if one is honest, while the map is small, she's also slow and spawns far enough away that a lot of the time an experienced group can ignore her if they so wish. the Beast on the other hand is one of the more formidable opponents with its combination of being a Massive Elite and also not allowing players to split the 2 damage and 1 horror up as you can see here.
Generally it is quite awkward to work on progression while the Beast is alive, and its 7 health does make it awkward to kill cleanly as most of the time investigators deal damage in batches of 2 or 3 damage at a time, but the fact it does not scale with player count weakens it a lot with larger groups. This is something that happens on and off with the enemies in Path to Carcosa, with the guests being a prime example of that. They're relatively threatening in The Last King due to it being a small location and the second scenario, but when they return in later scenarios they're no more dangerous than they were originally. This fits with some parts of the narrative the campaign is telling, but this kind of enemy scaling is handled better in other campaigns.
Overall Black Stars Rising is a solid scenario, better than “Where Doom Awaits” from Dunwich, but it lacks the bite that I want from a penultimate bit of the story. This is one of the places where the campaign can end, but it lacks the sense of dread that The Unspeakable Oath carries with it at the halfway point. There it felt like Hastur was a palpable, malignant force that scatters and breaks the investigators when his eye was upon them. Here despite the raging storm that is intended to demonstrate the power of Hastur's attention being on Earth it feels a bit disconnected, perhaps because it's also intended to be read as just a storm gathering that's been taken to be a sign by deluded investigators? I don't know, there's just something a bit missing from this one and even though it is superior to its Dunwich colleague, it still isn't as climactic as it could be.
The Return to... takes some steps to address this, adding two new Hidden Peril cards that represent Hastur's attention falling on the investigators during this. However they're not that mechanically interesting, essentially representing horror or damage when doom lands on certain agenda. There's not enough here to make them a threat except if they might cause an investigator to be defeated outright, that can generate some fun situations where the afflicted investigator seeks to push a specific agenda, but it's not clean or interesting enough when compared to other Hidden cards in this campaign.
Leaping or Diving into the maelstrom has our investigators arrive at their inevitable destination, the place the path has always been leading, Dim Carcosa. Dim Carcosa has a seven location map with the locations face up from the start. This is because on the back of each location is text which can be revealed and read once the clues on it are cleared out. The short passages on the back of these are honestly very fun to read, they provide more texture to Carcosa, peaks into other worlds, or even glimpses back into events that happened during the campaign itself.
These locations provide the backdrop and texture upon which Hastur himself spreads his influence, the first place where his influence makes itself known is through a subversion of the Sanity system. Investigators here cannot be defeated by having horror greater than their sanity. The fragmentation of someone's mind in Carcosa does not end their story in the way it does back on Earth, here you keep going, keep functioning until something else finishes you off. One way this can happen is through the Possession treachery cards, if you have double your sanity in horror then you are killed immediately. This is of course a sudden shock if you draw it when you're in that situation already, but if you draw it before hand you've got a chance to dispose of the cards before the inevitable takes you. However the price for ridding yourself of each of these cards varies, but the cost is always steep. The Return to... adds another aspect to these cards with the High Priest of Hastur, a harmless pest that does not deal damage, but if the High Priest attacks a survivor with a Possession card in hand, they are immediately killed.
Dim Carcosa is a bit puzzle like in design as you are not given a clear route to victory from the start. Instead you're fumbling about in the dark a little, investigating to collect clues and learn from the story cards on the back. Eventually these actions will bring about the arrival of Hastur and it is here that all of the different choices made during the campaign come together. The second Act card “Search for the Stranger” has three different versions, and the one you use depends on not just which of your Doubt or Conviction is higher, but also your total amount of Doubt and Conviction combined. A run that ends up with less than 5 total Doubt and Conviction uses version I, if higher, more Doubt than Conviction uses version II, more Conviction than Doubt uses version III and if they are tied, players choose. That may sound complicated but it boils nicely down to three narrative possibilities for Hastur.
I - Insufficient Doubt and Conviction results in the lead investigator being cursed with The Pallid Mask and Hastur appearing as The Tattered King in Hastur's Palace.
III - More Conviction than Doubt brings forth the revelation that Hastur is The Man in the Pallid Mask after all and he appears in the location where The Stranger was as Lord of Carcosa
II - Is my favourite of all the options, the doubters discover that The King in Yellow is nothing other than a figment of the Investigator's imagination. This spawns Hastur as The King in Yellow next to the act deck (which if you remember makes up half of a book along with the Agenda). This version of Hastur cannot be directly fought and requires players to find Story Cards that allow them to deal damage directly to Hastur instead.
In all cases Hastur's presence is immensely threatening, with The King in Yellow attacking all the survivors with 2 horror unless he is exhausted by a willpower test printed on his card. The Lord of Carcosa deals less horror because he has a physical presence and can only attack the location he is in, the same way any Massive monster can. The Tattered King deals a terrifying 4 Horror per attack, but can only attack one investigator at a time.
The variations of Hastur also start dealing damage to investigators if he is dealing horror in excess of sanity, which is another one of the ways that horror damage can kill investigators in this scenario. Both the physically present versions of Hastur (Lord of Carcosa, The Tattered King) also have an addition wrinkle in that if an investigator doesn't have any remaining sanity when they attack or evade them all Elder Sign, +1, 0 or -1 tokens drawn during those tests become an auto-fail token instead. On top of this, unless players “know the secret” they cannot defeat Hastur due to the protection that the Agenda deck gives him. So it is not just a simple fight versus a powerful foe with a lot of health, Hastur's secret must be revealed as well.
This is just a great way to bring home the three different paths that players have taken along the way and support the different ways that the story can be interpreted. However, I think that the Return to... box provides the final spice that elevates Dim Carcosa. This changes the Palace of the King location so that the back of the card reveals one final location that is tied to the story the players have been telling. This location can be Hastur's Throne Room, the Stage of the Ward Theatre from Scenario 1 or the Recesses of Your Own Mind.
Each of these provides their own version of what Hastur's secret is, Hastur and his throne are one and the same; the delusion that this is all a show and you are an actor on the stage; this is all in your mind, you wrote this, you authored it all. Which of these three destinations you reach is the result of the steps you took along the way and when you look back at the campaign as a whole, when you replay it and take a different path, the story flexes to match this interpretation.
Finally, at the end of it all we have five different resolutions, three different ones for the different versions of your ultimate foe and two losses depending on which is higher in respect to your Conviction or Doubt. Plus there's also the epilogue for those Investigators who still possessed a possession in their possession at the end of the scenario.
Final Thoughts
Path to Carcosa is very much deserving of its title as peak Arkham Horror and it is a genuine shame that this campaign has been retired from printing with no plan to make it available in the future. I think that this is something that should be made available in some form, be it un-vaultings like the one that FFG are doing for Arkham Horror the Board Game in Autumn (do people want a review of AH 2nd Edition before that Kickstarter goes live?) or making the cards available as print to order or print and play.
The writing in this campaign is incredibly well done and there are no scenarios that are bad, even the ones I like the least are still good experiences with variations that keep re-playability high on revisits. The passion of the designers in this one is very clear and it is impressive to see how much this campaign refines and improves upon ideas that came out in Dunwich just a year before. Hastur is also so much more of a looming presence and threat throughout this campaign in all three of his forms.
The Hidden cards are one of the many highlights in this campaign, forcing players into actions that are at best a waste of time and resources and at worse actively harmful and the cultists when they are at the forefront of the scenario also manage to feel so very different from their counterparts in Night of the Zealot or The Dunwich Legacy.
The Return to Path to Carcosa box is also a huge part in adding more depth and richness to the experience, it is a shame that this was not bundled in as a part of the reprinted campaign in the larger box but that is a consistent issue across all of the Return to boxes and at this point now with the campaign itself retired off the shelves this is something that won't change.
Path to Carcosa reaches a level of narrative storytelling melded with thematic mechanics that board games rarely reach and MJ Newman's love of The King in Yellow is a core part of what helps this campaign shine. I think this is the Arkham Horror campaign that every board game player should play through, at least twice. If they can.
Comments (6)
We just finished our campaign, first playthrough of Carcosa for everyone (ended up along the Doubt path). My friend owns the game and after Dunwich and some lackluster RNG-punishment I was a bit hesitant to start another AHLCG campaign but I'm glad we did. I whole heartedly agree that this is a great campaign and your further analysis of the nuances of it make me appreciate it even more, thank you! I didn't really expect it but I wouldn't actually mind replaying it sometime down the line. And I guess thematically we should as we did end up with a couple investigators being possessed at the end of it...
A brilliant write up of the campaign that sold me on arkham horror, I hope you remembered to take your 33 horror as a result of this
Wow, such an insightfull piece on our (or at least my) most beloved AHLCG campaign. The fact that you can write such a review, on a campaign which has been out for years, and out of print for some time, regardless of the "new hyped thing" is one reason why, for me, you are THE critic I still read, after so many years. Amazing review, nothing to add, it has it all.
Thank you, I've been meaning to cover these campaigns for a long while, and it's only recently I've had the time to do so. I'll eventually cover all of them and the individual scenarios as I broaden what I cover.
I just got into Arkham Horror LCG recently and spent far too much money assembling the Path to Carcosa mythos packs. Really looking forward to playing through it blind, so will be reading this article in snippets as I go. In your opinion, is the Return to set worth the very hefty cost? If you are doing a single play through does it add value? Or is it exclusively for replayability?
You should very much play your first campaign through Carcosa without the return to. It does add some great stuff for the replays, but it is absolutely not worth the amount one now has to spend. Skipping the Return to boxes on a first play is good advice for just about every campaign except for The Forgotten Age where one should use the Return to Explore rules (You just need the pdf of the Return to for the FFG page to use that). If you have a printer you could print out the Return to cards and slip them in over the cards they're replacing if you replay the campaign. As much as I like the additions, they're far from essential. Especially for just a single playthrough. However I'd totally recommend playing Path to Carcosa at least three times for each version of the story.