

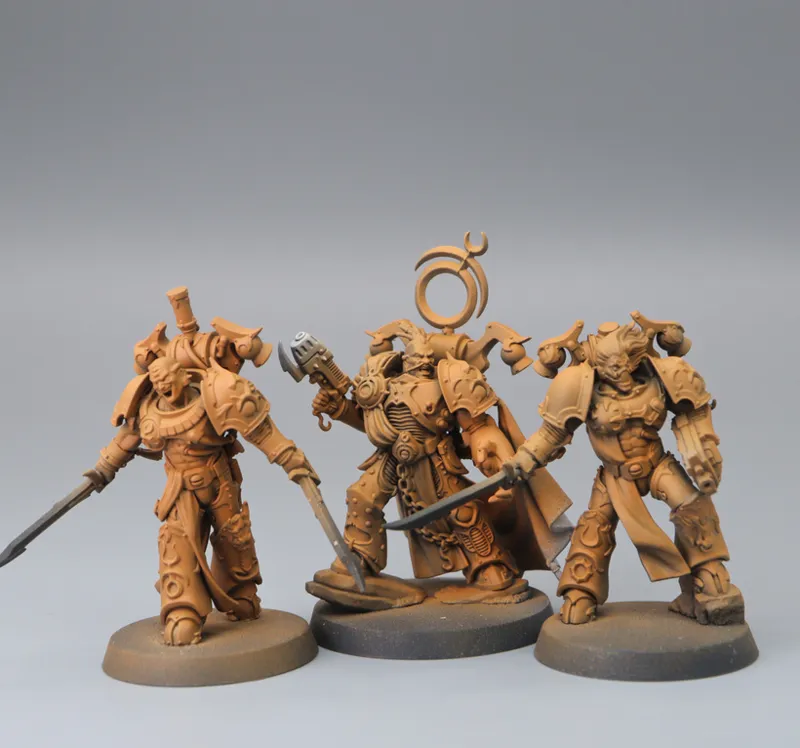


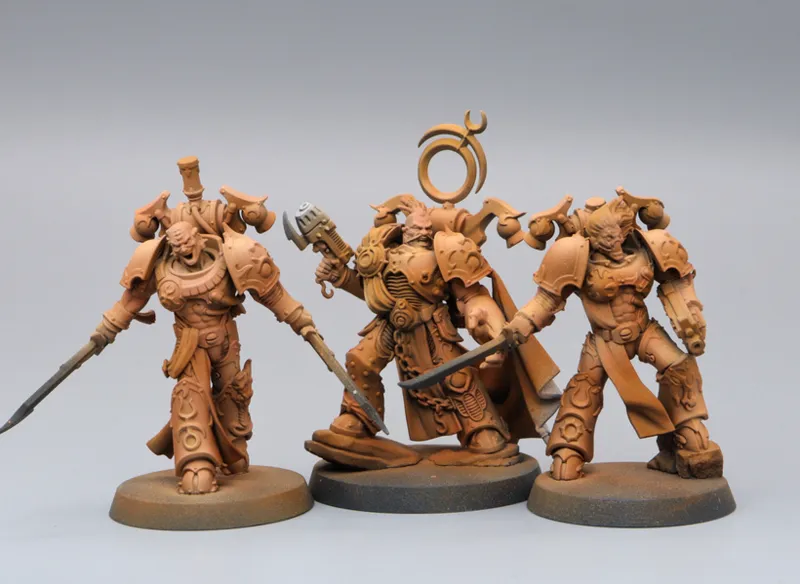
I have done a thing!
Well I promised I would didn't I?
So I was able to grab some time the other day to finally translate the theoretical colour scheme tests for my Emperors Children we looked at last time, into the practical 3D version. I saddled up the airbrush and started slinging some paint. I'm really happy with the way the scheme has translated from the page onto a miniature, and I thought I'd share that painting process with you.
After the realisation that it had actually been a minute since I had done any painting (skill fade is real, but more on this in the future!) I was able to get started.
As is typical of how I paint, I started with a pre-shade of the ever popular Tamiya Flat white over a black undercoat. As you've probably seen in our Youtube videos it's best to do a few passes to get a nice build up of white without blasting it on too thick.
After the white was dry I mixed up Citadel Deathclaw and Vallejo Model Colour Light orange in a 1:1 ratio, and thinned it down to go through the airbrush at a calm 18-20 PSI, as I didn't want to saturate the model, or cover up the pre-shade by going in too heavy.
I gave the models a couple of coats of this mix to get a nice even layer. The areas of light and shadow were visible but the black was still showing through a little too much in places for my liking and muddying the shadows.
With that in mind I added a bit of warmth and colour back into the shadows with a focused airbrush of Citadel Skrag Brown. It frankly didn't do much in the way of pushing the value contrast but that's not the purpose this time, and I knew that the next layers would do that for me (a bit too well in fact!)
That felt like a nice base to work from to now start pushing the brightness a little, and start working in that fleshy colour from the reference into the highlights.
Nice and simple this one I just did a simple airbrush highlight with the Vallejo Nocturna Medium Flesh. Nothing fancy here, just focused the highlights on the areas indicated by the pre-shade step, and where possible, slightly from above to keep some shadows under the sculpted details.
Yep happy with this, the colour works well, and the volumes are doing their job. Bit annoyed it went slightly speckly on that shoulder pad, I wasn't paying enough attention to the mix as I had started to rush a little at this point. That's a lesson in itself! slow down and you wont have to go back and fix anything
At this point I was a bit worried the highlights were desaturating the armour a bit too much so I decided I was going to go one more stage and use the AK Gen 3 Sunny Skin from the colour tests. Again as with the previous stage a simple airbrush highlight, spending the time to keep the paint volumes nice and tight.
I couldn't decide if this was now too bright or not! I left these on the side for 20 minutes, went and had a cup of tea and came back to them with fresh eyes (always a good idea if you're not sure on the direction a model is taking) and yes, they were a little too bright.
Well it was an easy fix, I grabbed some Citadel Gryph Hound Orange and thinned it right down (4:1 thinner to paint) and using the airbrush gave it a couple of thin passes over the whole model. This took the edge off and added some warmth back into the armour.
Once this was dry I gave them a layer of Ammo MiG lucky Matte Varnish to get rid of that Contrast paint shine and they were done!
Happy with how these came out. The theoretical colour tests/research was absolutely worth it, but you cant beat practical tests on a physical miniature. Next time I'll grab a spare part from the bitz-box and give it a test before I start painting the real miniatures.
Next up I'll start blacking in a few select armour panels (looking at you speckly shoulder pad!) and base coating a few details to give me a better understanding of how the whole piece will look when completed.
If you have any questions on this process, any requests for what you would like to see more of, or just to chat more about paint, drop a comment below.
Cheers
Ben