








Sewing the Loretta Shorts Pocket
A few of you have reported having some trouble sewing the Loretta pockets, so I've taken some photos of the process for you here! In return, you have to promise to go back and watch the video again as well! Pay particular attention to 02:25 to 05:12, where I explain what the pattern pieces are and how they go together.
Here are the steps in the instructions, plus photos.
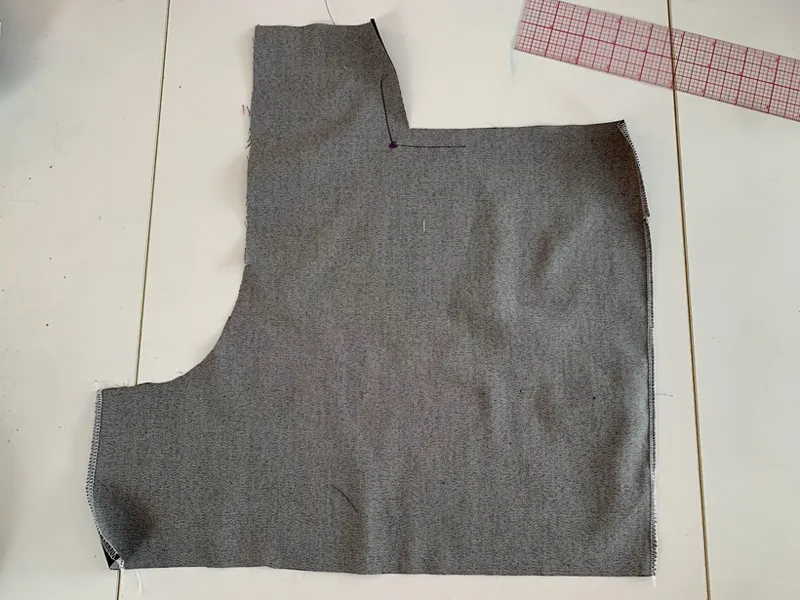
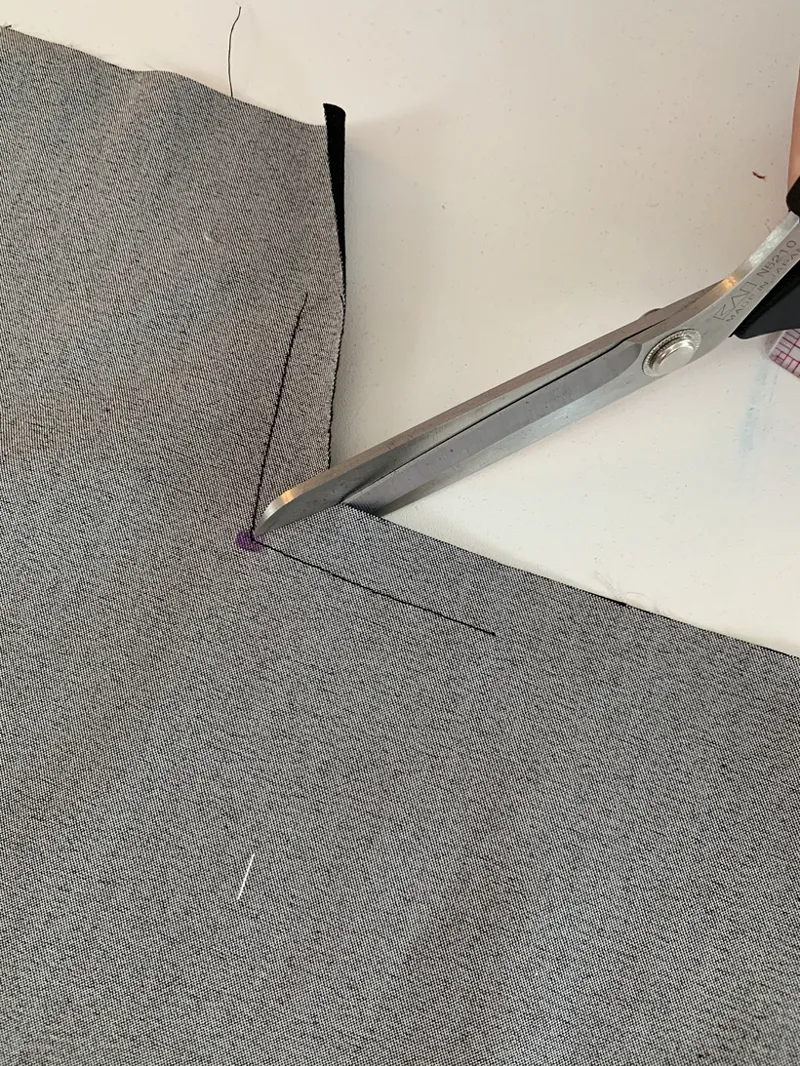
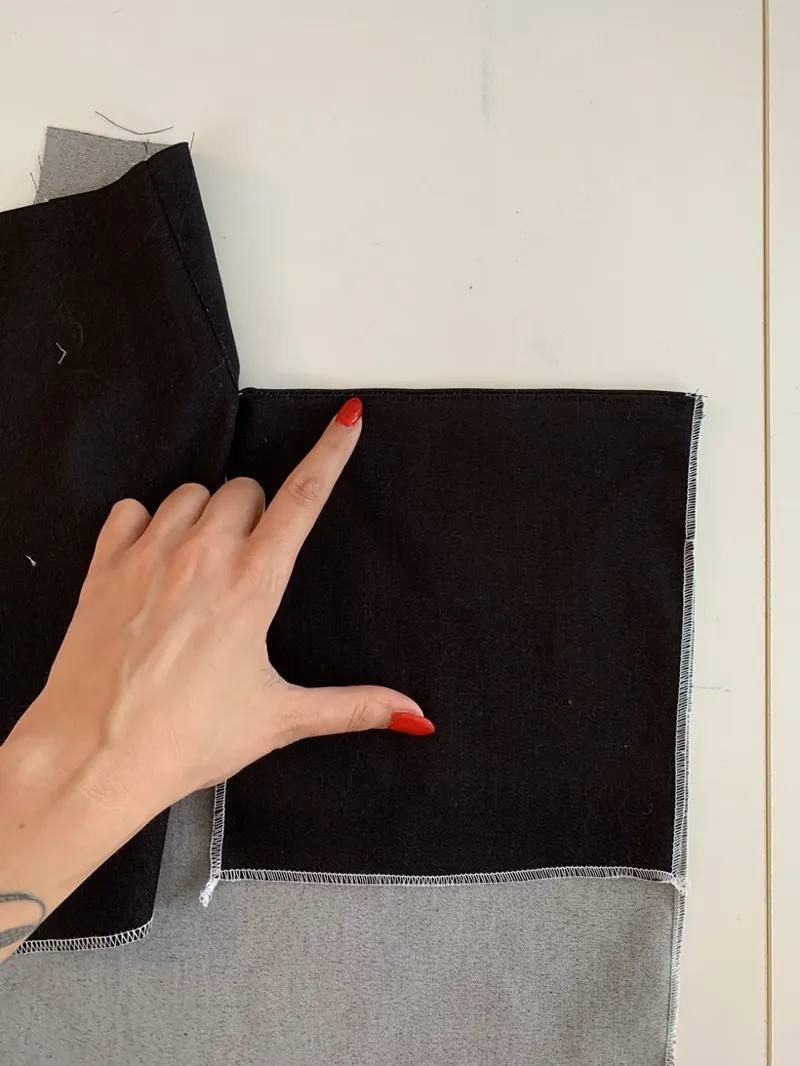
2. Sew reinforcement stitching on Shorts Front (1) inner pocket corner using a ⅝-inch (in) (1.5 cm) seam allowance, pivoting at circle.
Clip to circle.
3. Pin Pocket (2) to vertical edge of pocket opening on shorts front, right sides (RS) together, matching circle marks.
Stitch, ending and backstitching at circle, forming a dart shape.
Press seam allowance open.
Finish raw edge of “dart” on shorts front.
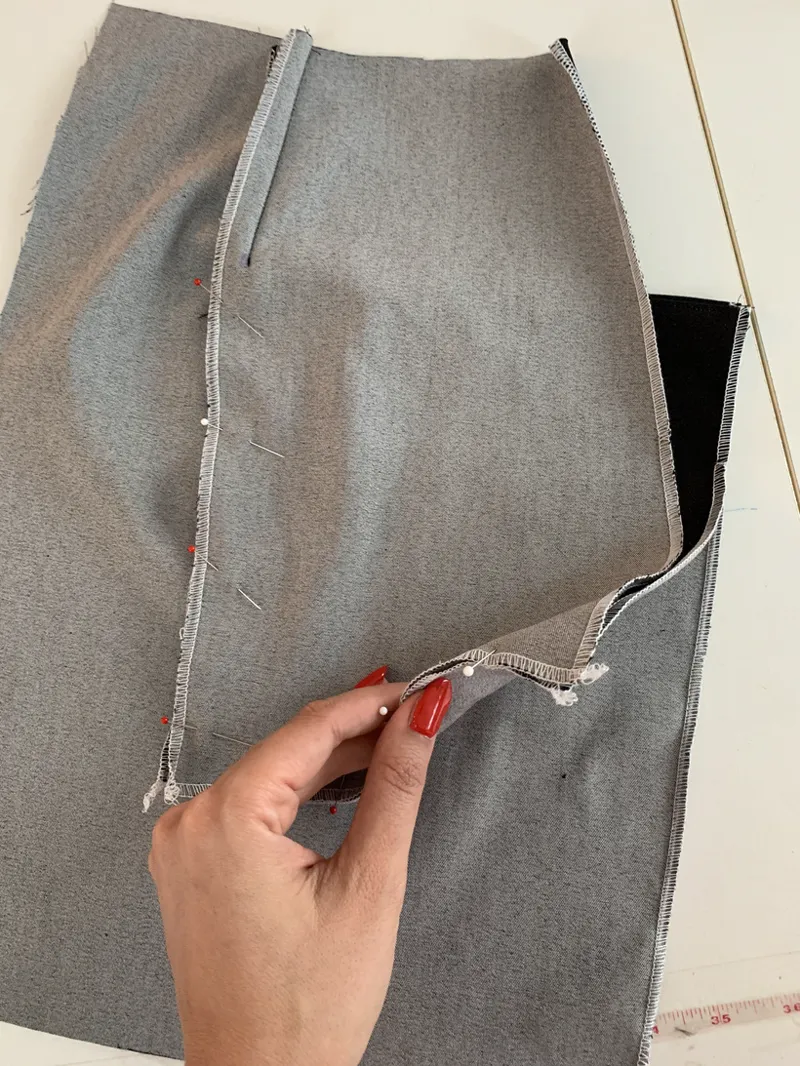
4. Pin Pocket Bag (3) to horizontal edge of pocket opening on shorts front, RS together, matching circle marks.
Stitch, ending and backstitching at circle.
Grade seam allowances so that pocket’s seam allowance is narrower and shorts’ seam allowance is wider.
Understitch pocket bag.
Press to inside of shorts.
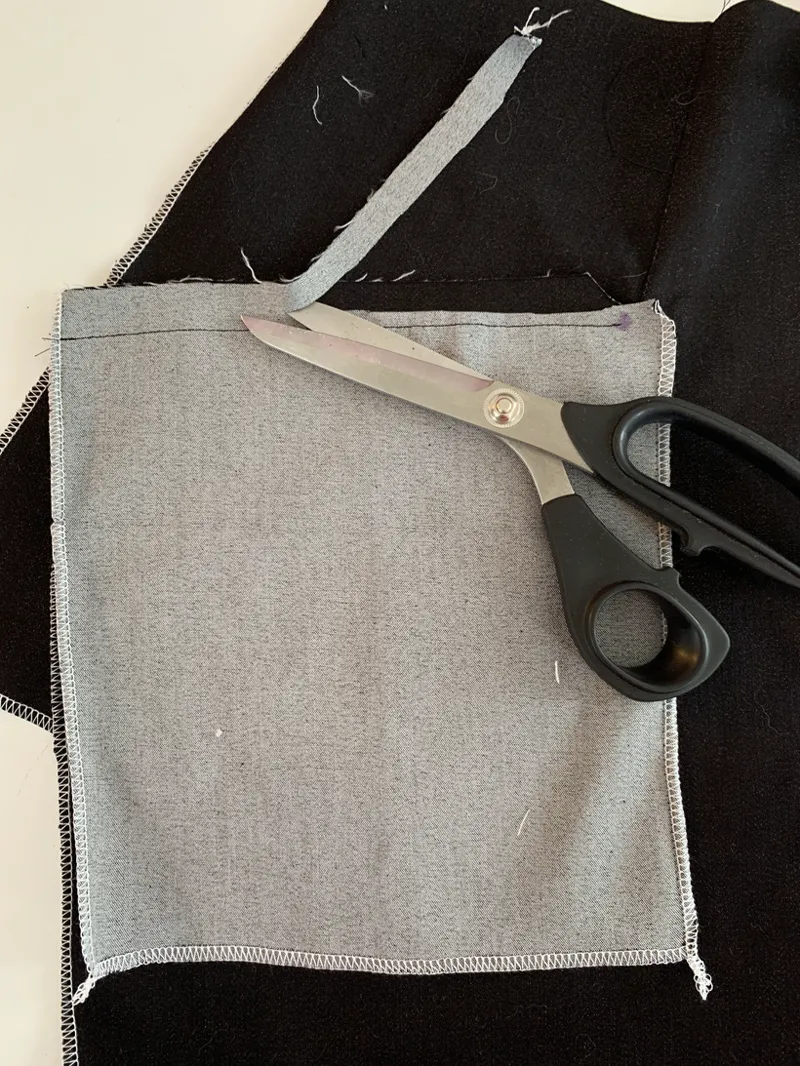
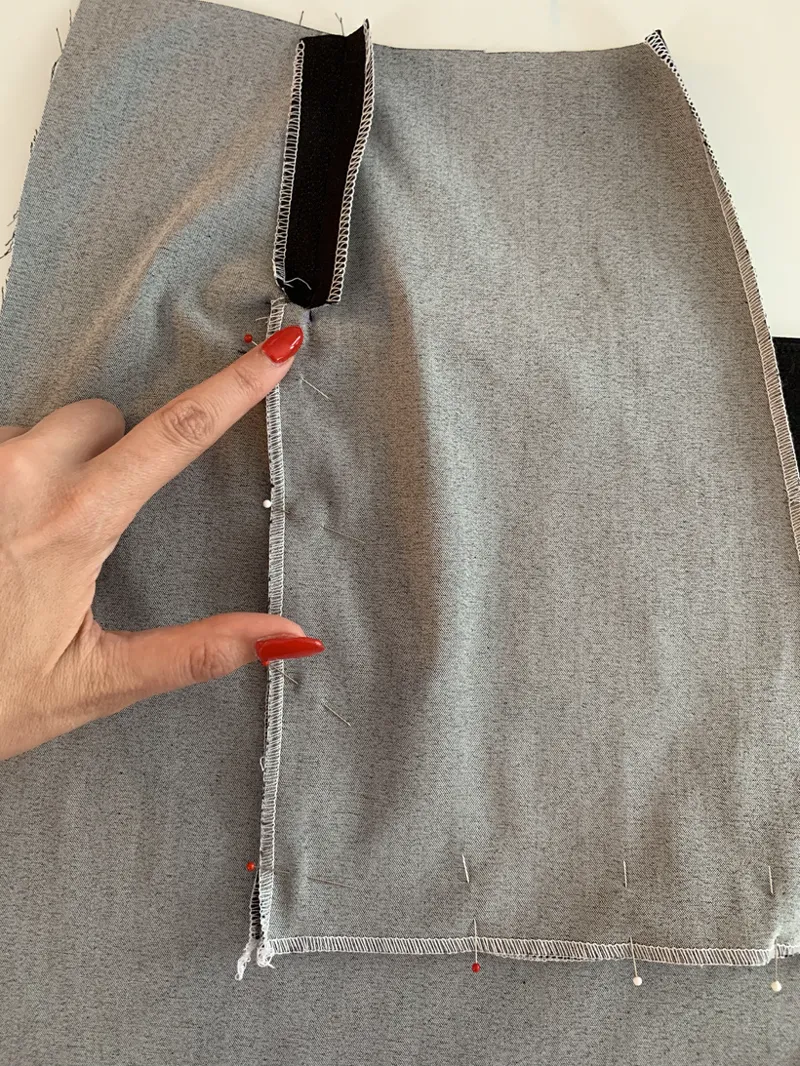
5. Working from wrong side (WS) of shorts, pin pocket pieces RS together along inner vertical edge and lower edge.
Clip to circle on pocket seam allowance.
Stitch pocket edges together.
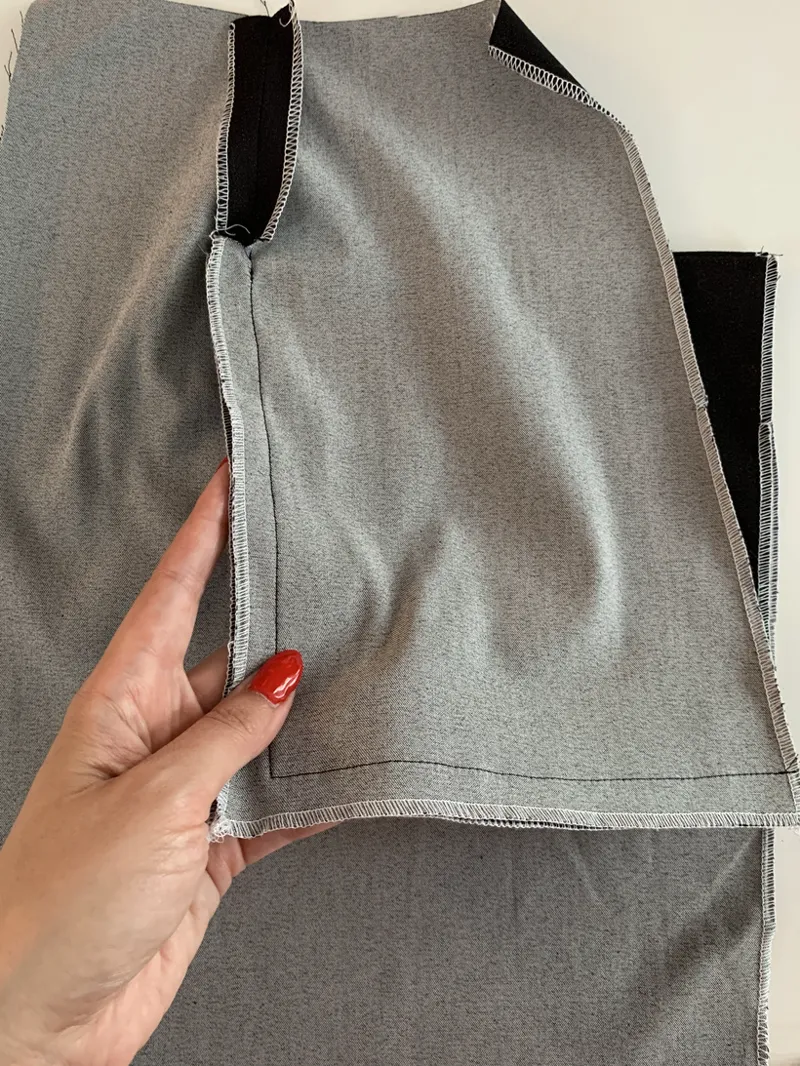
6. Match all side seams together (shorts front, pocket, and pocket bag) and baste layers together.
At this point, you can give the pocket corner a little press.
Hope that helps!
xoxo,
Gertie


Comments (38)
This made everything so clear!
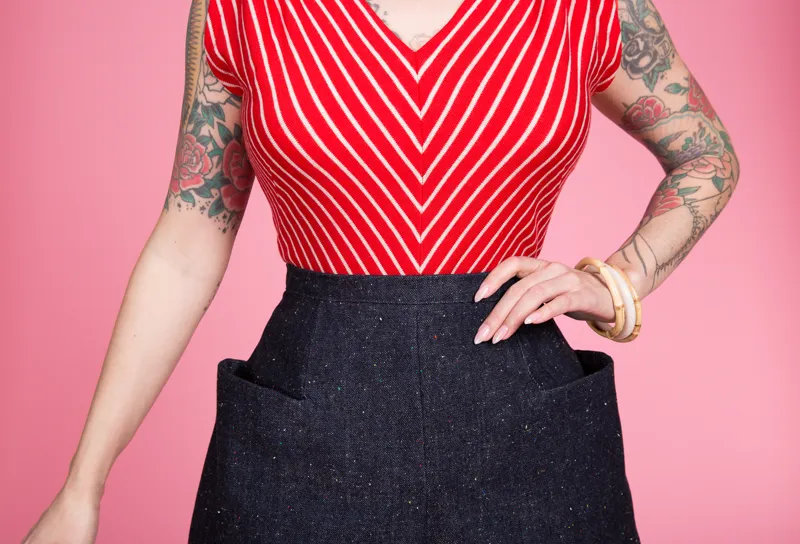
What shirt are you wearing with the Loretta shorts in this photo?
I believe it's the Rita Pattern
Thank you for the tutorial I look forward to many pairs of shorts.
I know I'm late to the party but I only recently discovered your patterns and became a patron and these shorts are the first I have made. I am a novice sewer and the pockets were a little tricky to start with but the video was an excellent help. I also have to say that I'm amazed that they fit to a T!!! I have NEVER had that happen with a pattern before. I have always had to change things like crotch length, waist measurement, length of short etc. But here, nothing. Just a pair of shorts that fit like nothing else and are extremely flattering. Thank you very much!
just seeing this. Getting ready for my first vacation in over 1.5years!!!
I had to look at these pictures again to see what I was missing because of the way the video was shot for the step 5.1. I thought I was missing something but couldn't find it and my pockets wouldn't press correctly.
I love these shorts! I made three pairs now and used them all summer! 😀
Thank you! This little tutorial was perfect! I was having so much trouble picturing what I was supposed to do, but with your help it all came together beautifully!
Do you have any tips for alterations? I'm looking at crotch length and am wondering if extra length in the front is a style decision or if I need to make an alteration on it (everything else fits great).
I am also needing to Make alterations to the crotch area, any tips?
Thank you!! I'm just getting to my pair and this tutorial helped IMMENSELY!!! I love how the pockets look!
This is great! I'm coming from using standard tissue paper patterns so I need that distinct "right side" , "wrong side" differentiation. This was perfect!
Thank you so much! I have some minor visual impairment and the video is great but the pattern on the shorts made it really hard to see what we needed to do...this is perfect for me! I managed to pin and peek and I think my mock up was right but this will let me be sure on the good versions.
This was perfect! Exactly what I needed. I now have pocket success!!!!
Super helpful, thank you, Gertie!
Where can I get this gorgeous fleck denim?!
B&J Fabrics.
Thanks Gertie. I haven't tried a pair yet as I am making dresses. However in watching the video i can see it can be a bit tricky. I thought the video provided and excellent description and the pictures now give the details a frame at a time which also helps
I just finished my muslin! The video was actually more helpful for me! I LOVE the fit of these! You’re amazing Gertie !!
This helped so much! I know where I messed up now! I didn’t cut into that corner. Thank you so much 💕
this really helps. I was getting confused as to where and how to clip seam allowances properly as I didn't want to clip something wrong and end up w a hold on the R.S. on my shorts. Thx a lot for this Gertie!
These pockets are great! I love the way they go together.
Thank you for this!! You’re the best
Hi Gertie, I think these photos make the steps much clearer. Thank you so much for being so helpful and responsive. When you know what you are doing it is simple. My first pair took me ages although I figured it out myself eventually but I whipped my second pair up in no time today xx
Glad it helped! I definitely can’t do both photos and a video every month 😅 but happy I could help out on this one!
I can't see them ither 😭
They’re definitely there on the app! Might be a connection issue?
Can I make it without pockets
You would have to adapt the pattern so it didn’t have the pocket opening.
🤔 i cant see the pictures, also not able to click on them. Is it my phone? Dont havea computer anymore due to virus
Are you on the Patreon app?
Thank you for all you do to make sure we can have the best looking handmade clothes that are much better than factory made😁
This is so helpful! My muslin turned out good, but the different colors of fabric made it much easier to follow than the video. You’re awesome.
Thank you! I just finished my Liz and I’m getting ready to start a Rita and Loretta outfit - I have a feeling I’ll be referring to this and the video a lot! 😂😂
So detailed! Thank you so much for taking the time to explain this.
Thank you so much for taking the time to further explain this step with photos! 💗
Thank you for this! I was the one you responded to yesterday and I went back to watch the video and managed to work it out, but it did take me a while - these photos are perfect, and will be great when I give them another go - thank you!