


Mastering the Basics of the Principled BSDF
What’s the real difference between believable plastic and a cheap-looking imitation? How do you make metal feel heavy and authentic, not just like a gray, shiny blob? The answer to almost every material question in Blender lives inside a single, powerful node. This node is the Principled BSDF, and it's the universal starting point for creating anything from matte plastic and rough wood to gleaming metal.
In this first BSDF post, we're going to master the foundational settings that cover the vast majority of common materials. Once you have these down, you'll have a solid base for the more advanced properties, which we'll cover in a follow-up post, "Part 2," coming soon!
The "Why": What is PBR?
Before we touch a slider, what is this thing? The Principled BSDF is Blender’s user-friendly toolkit for Physically Based Rendering, or PBR. In simple terms, PBR is a method that aims to simulate how light really behaves on different surfaces in the real world. This node gathers all the most important physical properties in one place so we can create believable materials without needing a degree in physics.
So, why do artists often talk about "PBR textures" versus "procedural textures" as if they're opposites? This is where a common - but technically incorrect - shorthand comes into play. PBR isn't actually a type of texture; it's the method itself, the set of rules for simulating realistic light. In practice, artists simply use "PBR" as a quick label for materials made from downloaded image maps, while "procedural" refers to those built from scratch using nodes. Just remember that this only describes the data's source, as both approaches are valid ways of feeding the Principled BSDF the information it needs to work its magic.
Giving a Surface Its Story
Let's begin with our subject for this guide: a detailed, custom-sculpted chess piece.
1. The Foundation (Color & Roughness)
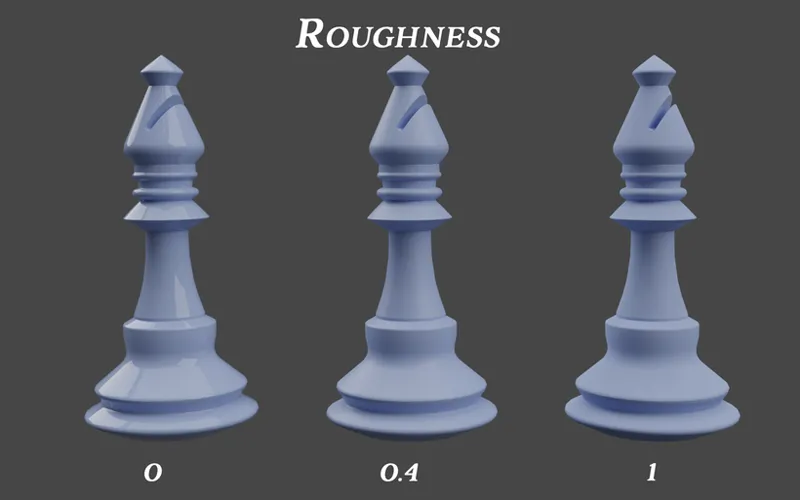
The first thing our chess piece needs is an identity, which we give it with Base Color. But color alone is boring. The most important slider for telling a material's story is Roughness. Think of it as "micro-surface imperfections." A value of 0 means the surface is perfectly smooth, like a mirror, giving you a sharp, clear reflection. A value of 1 means the surface is incredibly rough, like unpolished stone, scattering light in all directions and giving you no clear reflection at all. Almost every material lives somewhere between these two extremes.
Chapter 2: The Great Divide (Metallic)
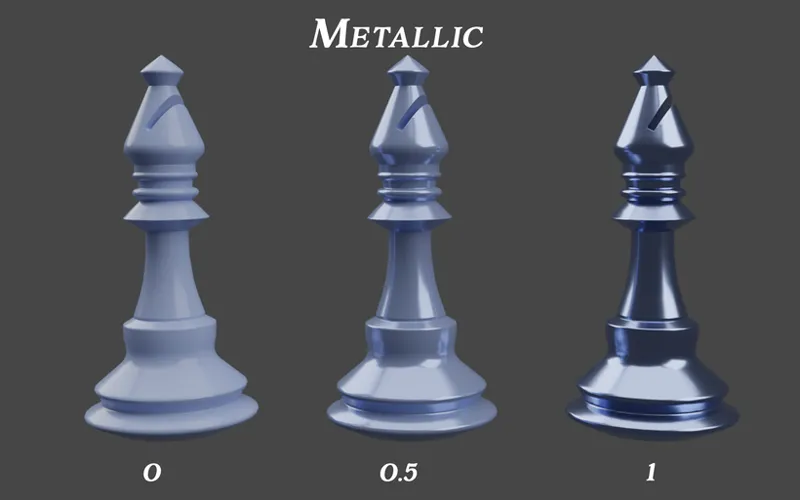
Now for the biggest decision you'll make: is this chess piece metal or not? The Metallic slider is less of a slider and more of a switch. For non-metals (plastic, wood, glass, ivory), you leave it at 0. For raw metals (gold, iron, silver), you crank it to 1. This slider tells Blender to use a completely different set of physical rules for reflections. The most obvious difference? Non-metals have colorless reflections, while metals have reflections that are tinted with their base color. Getting this switch right is a huge step towards realism.
Chapter 3: The Supporting Actor (Specular)
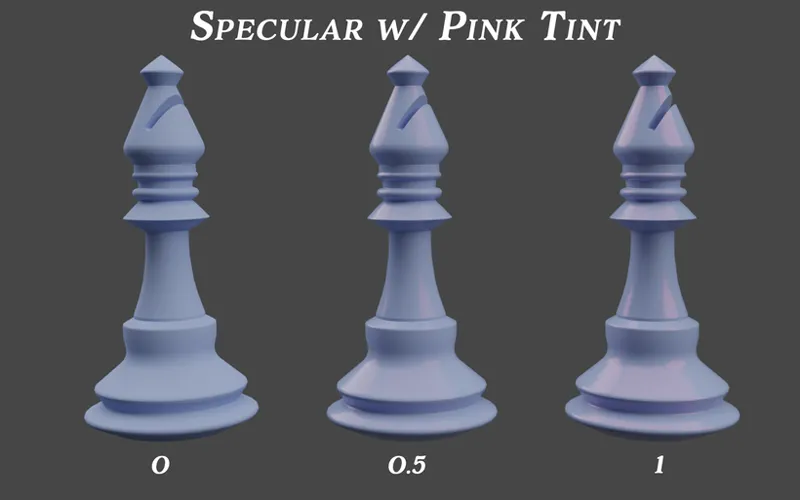
When your Metallic slider is set to 0, the Specular slider comes into play. In the real world, the reflectivity of a non-metal surface changes depending on the angle you view it from. Look straight down at a wooden table, and you see the wood grain; look at it from a sharp, grazing angle, and it becomes almost mirror-like. This is known as the Fresnel effect. The Specular slider is your artistic control over this phenomenon. The default value of 0.5 represents the physically correct reflectivity for most common materials (like plastic). You might lower it for very rough or porous surfaces, but for most cases, leaving it at the default is the most realistic choice.
Pro-Tip: The Next Level is Texture
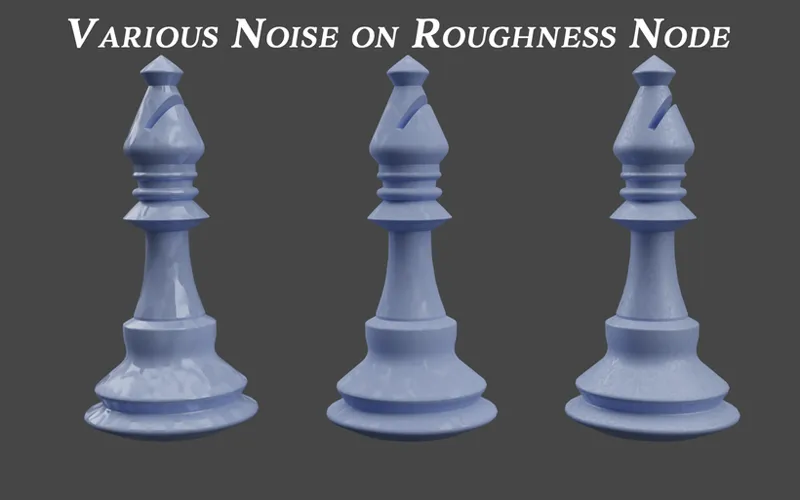
Once you've mastered these sliders, the real magic begins when you stop using single numbers and start using textures. The fastest way to break up that "perfect CG" look is to plug a simple Noise Texture into the Roughness input. This instantly adds subtle smudges, fingerprints, and surface variations that make your material feel like it has a history and exists in the real world.
And that's the foundation! By starting with a color, defining its roughness, and deciding if it's a metal, you now have the fundamental recipe to create the vast majority of real-world materials.
Stay tuned for Part 2, where we'll build on this knowledge and dive into the advanced settings like Subsurface Scattering for creating realistic skin, Transmission for perfect glass, and Coat for that professional car paint finish.
Of course, for more tool showcases and quick tips, the main YouTube channel is always there for you. As always, thank you so much for your incredible support. It's because of you that we can take the time to create these deeper dives into the art of 3D.
Want to get even deeper into Blender, or get one-on-one help with your own Blender issues? Our Blender patron tiers give you access to deeper knowledge, extra help, and exclusive content! Become a patron and grow with us and our community.