




Finishing Spooky Halloween Things & Petticoat Assembly | Weekly Sewing Vlog!
Another week, another vlog!
I've been working on my annual 'pumpkin project' this week, so hopefully the video about that will be coming next.
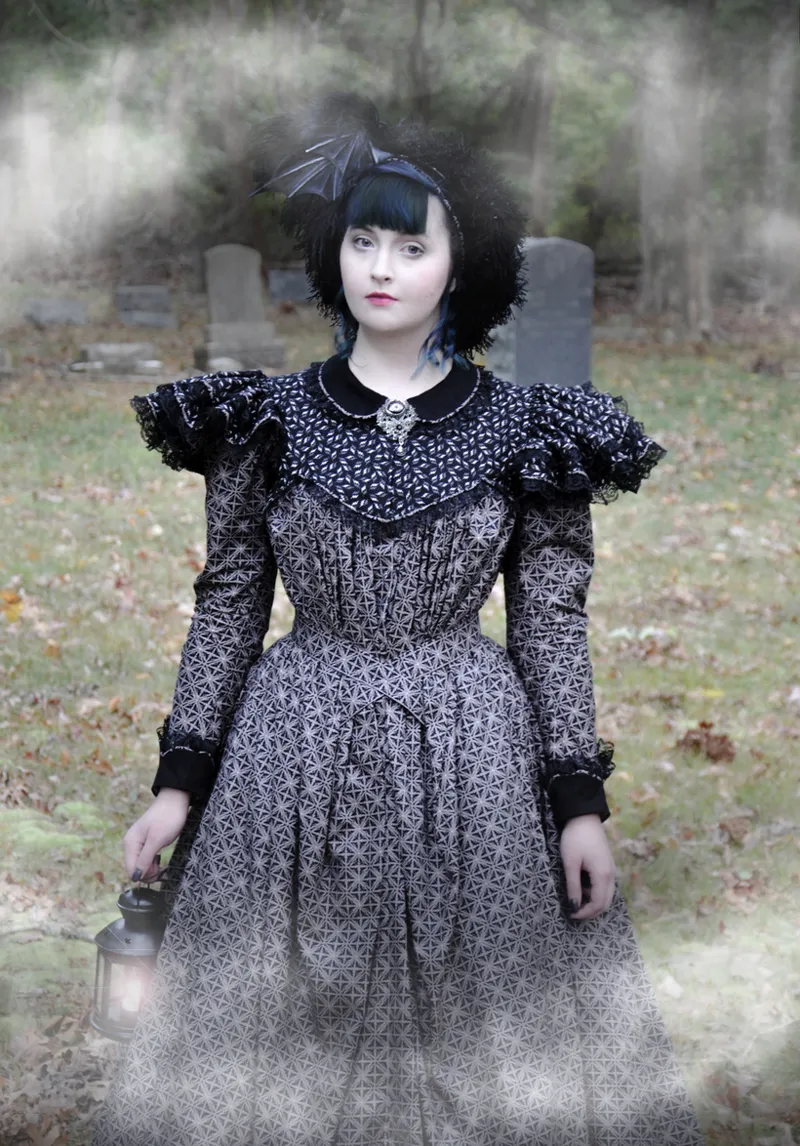
But in the mean time, here is a vlog that features the conclusion of my 1890s wrapper, and 1840s blouse. I also made a petticoat and started on a taffeta skirt.
And once that was done, I got my 1890s wrapper photographed. I still haven't edited the full set, but I'm quite pleased with the photos I've processed so far. These will probably be the not-so-seasonally-appropriate prints for next month.
Also, as promised in the video, here are my petticoat measurements for anyone who is curious.
The finished petticoat ended up having two layers. Both layers are made up of strips that were cut on the full width of the fabric (in my case, 60"). The width of the fabric doesn't matter nearly as much as the proportions of each tier.
Each tier of each layer should be 2x the width of the tier it attaches to prior to gathering down. Start with the largest tier first and work your way up the petticoat.
So, with layer 1 I:
hemmed the bottom edge of 1d
gathered the top edge of 1d [to half its original width]
sewed 1d to the bottom edge of 1c
[bound seam allowance with horsehair braid - optional, and repeated at every seam]
gathered the top of 1c [to half its original width]
sewed 1c to the bottom of 1b
etc.
These measurements include 1/2" seam allowances at either edge, and a 1/2" hem allowance for the 5" strips.
Layer two is a bit different - the overall process is the same, but the front pieces (left side) and back pieces (right side) are assembled separately, then seamed together. The top edge of the front piece should be gathered to 2/3 the width of your waist, and the back side to 1/3, forcing a lot of volume to the back of the petticoat.
(the top edge of layer 1 was gathered evenly)
Each layer (1 & 2) were assembled separately, with a 12" slit left open in the center back seam. The edges of the top tiers were aligned and stitched together prior to binding.
Materials and everything mentioned in the video should be linked in the description box! :)
Comments (12)
The black dress looks stunning and amazing as well. The patience you have to do all of the hand sewing and detail work is inspiring. Can't wait to see the other projects come to life as well. The lace blouse looks so delicate and pretty. I do like the sleeves and think it will look good on you in the end. Thank you for sharing it with us.
Love the spooky details like the crisscross brooms and ravens!!! So nice to see more sewing from you. I also love seeing the counted and curated fun!!
The wrapper turned out so gorgeous! I can’t wait to see how the other two projects turn out.
Loved the black wrapper
It used to be common to have picnics at gravesites in the 19th -early 20th century. I don’t think taking pictures there is disrespectful at all. Love the wrapper and I really do hope it becomes a pattern.
Really enjoyed this, thank you Angela! I loved how your wrap dress turned out. Love it! Can't wait to see the rest of the 1830s and Pumpkin Dress. You are very talented!! Cotton Organdy is so expensive here is Australia. I love how it makes a beautiful petticoat with plenty of foof. Sending best wishes to you and yours from Down Under <3
I'm very tempted to go buy a pattern I don't need just to get that packaging
i bought buttonsi didnt need! for the cute packaging <3
I adore all the work you do, It really makes my day whenever you release a video. Thank you so much.
Look who is back! Thank you. The video makes me want to head into the sewing room right now and finish up the dress draped over me machine. It just needs closures. I have fabric sitting there ready for my next project too. I am making face mask out of the scraps to send to friends in Brooklyn, they send some on to Ukraine...it brightens their day to have fun coverings in these apocalyptic times. ♥️
The wrapper is absolutely stunning! I do hope you sell the pattern because I would love to make one myself! It's wonderful to see you sounding so excited and energized, too, it's very inspiring!
LOVE how the black one turned out! Though maybe I'm biased because fall/Halloween is my favourite time of year :P