











Prepping for mould making.
Sort of a shop update for what's been going on the past week. I'm working on the next video which I'll hopefully have up next weekend if everything goes to plan. My goal for the video is to make a start on the moulds.
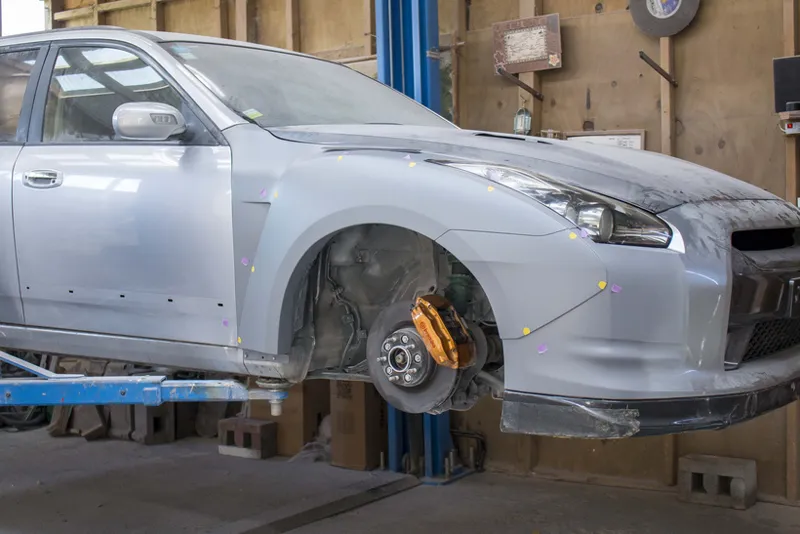
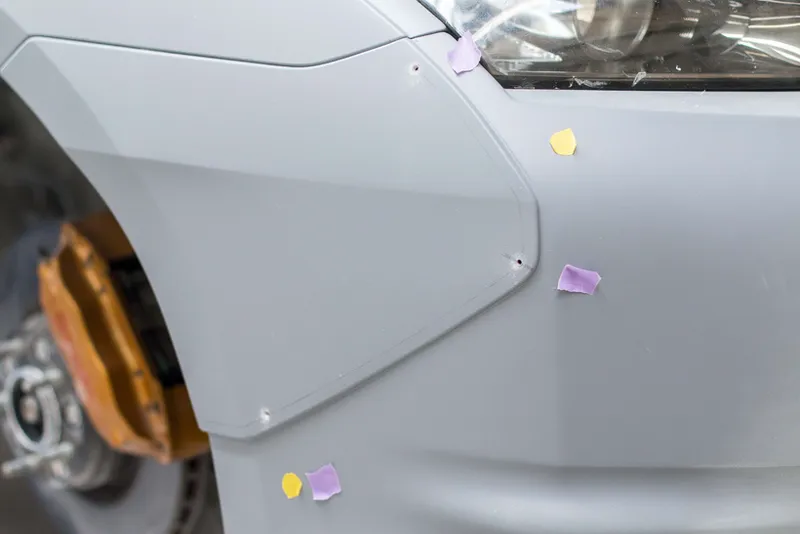
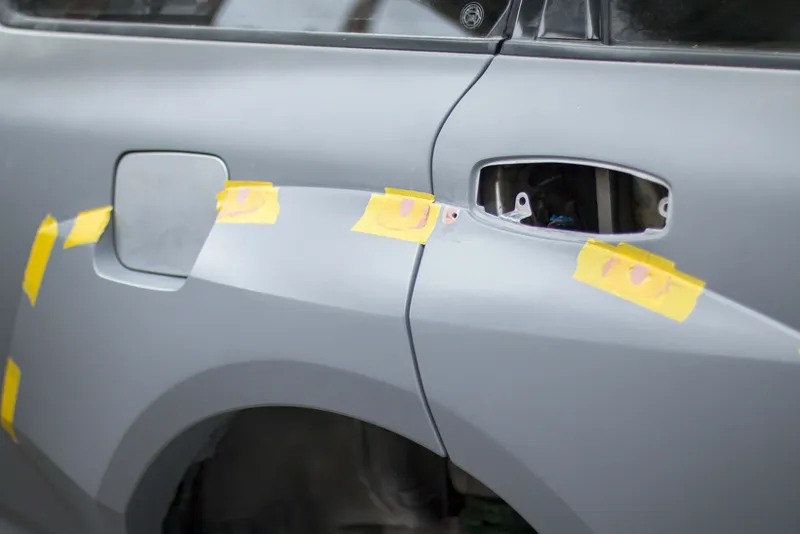
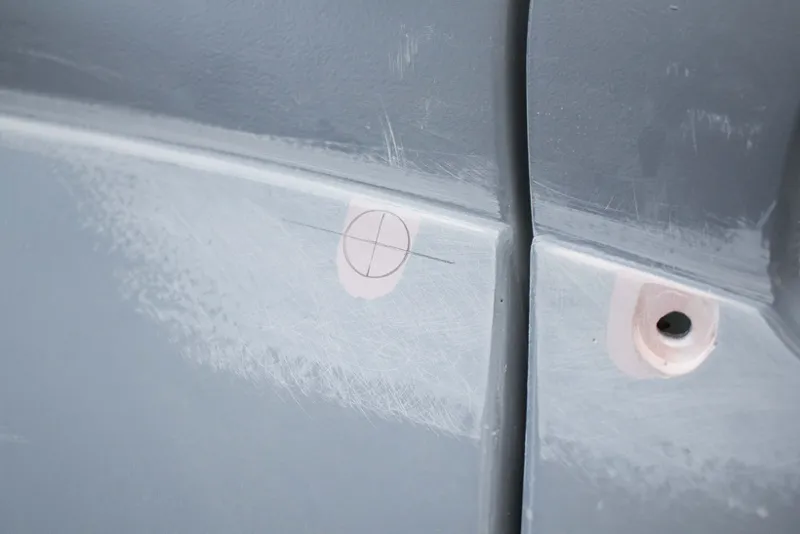
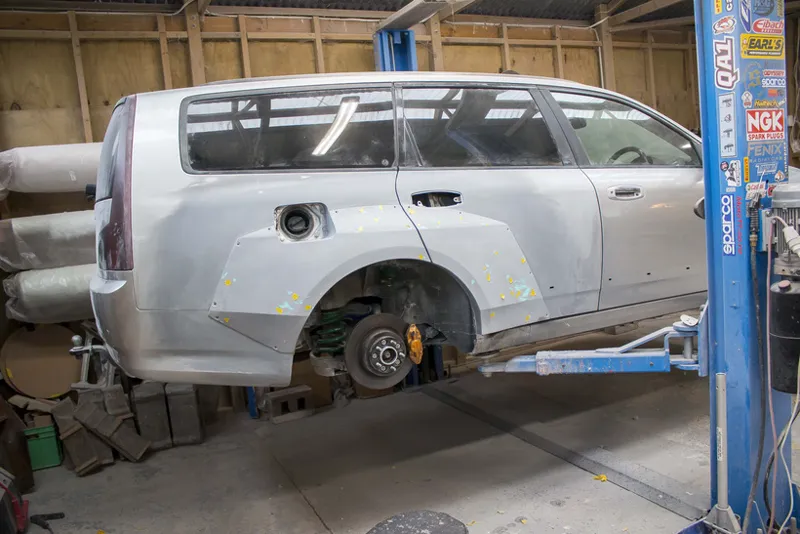
Started out this week by marking out where all the bolt holes were going to go on the fenders.
To help me visualize the placement I cut out a bunch of pieces of tape and moved them around until I had the correct spacings. There was a little bit of measurement but mostly with stuff like this it gets overridden by what looks best. I tried spacing them all out perfectly evenly but in some spots it looked a little off. It killed my OCD but I'd rather have something that looked correct at the end of the day.
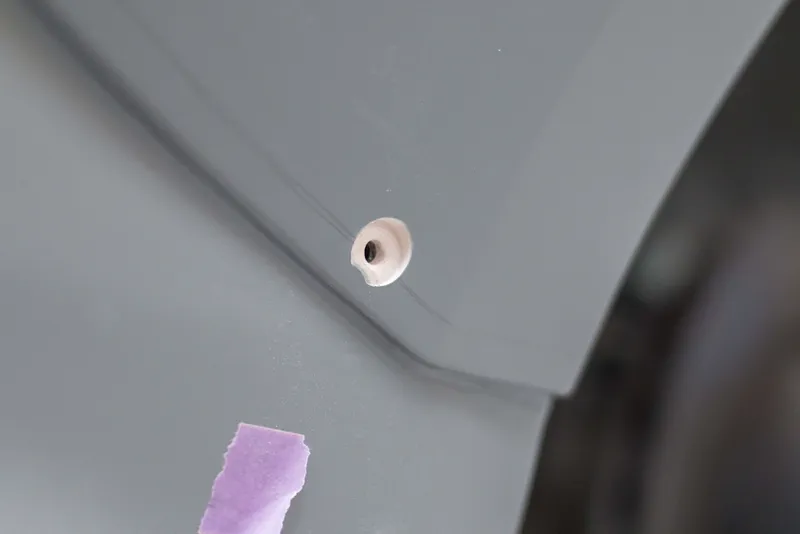
Once I had the spacings where I wanted them I drilled out all the pilot holes. These will turn into the actual bolt holes when the kit is finally fitted with the M5 hardware and the rubber well-nuts.
I'd been stressing over this step for ages because mostly it was an irreversible change that I knew a lot of people weren't going to like, but also because I just wasn't sure what the best strategy was going to be for actually making the recesses.
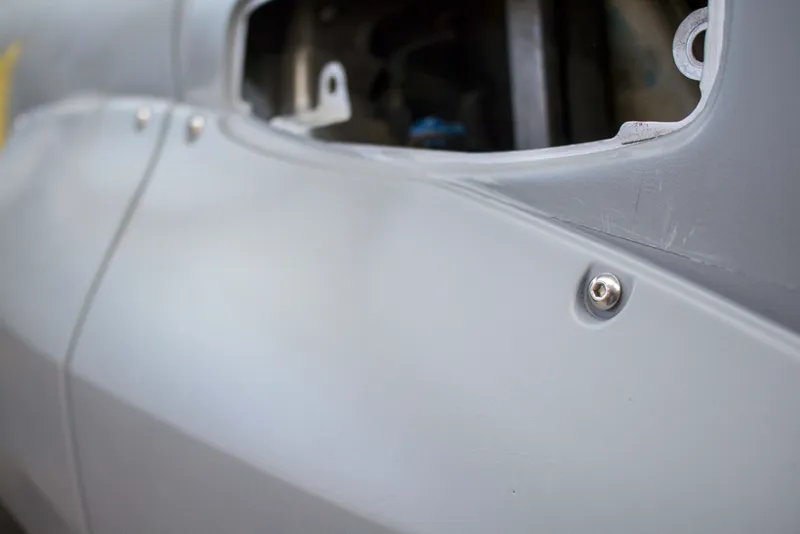
The method I eventually settled on was to just use a normal spade bit and slowly drill the holes out.
Something about this kit and me in general, I'm a practicality sort of person. I will always prefer bolted on kits because I'm the kind of guy that likes to take things apart, and also because here in New Zealand, if you were to try and mould a kit in, our climate will always crack the join between fiberglass and metal and you'll be left with a big crack on your body work.
So bolts were definitely the way to go for me. But sort of contradictorily, I've never been a fan of dress up bolts or those big gaudy washers some people fit to their widebodies. They make these kits look so tacky in my opinion. Even though I am making this kit for sale and at the end of the day, anyone buying this kit can do whatever they want, I was not going to make it easy for people to use dress up hardware. So when I was picking which size hole to drill for my bolt recesses, I was sure to pick one too small for any of those washers to fit in.
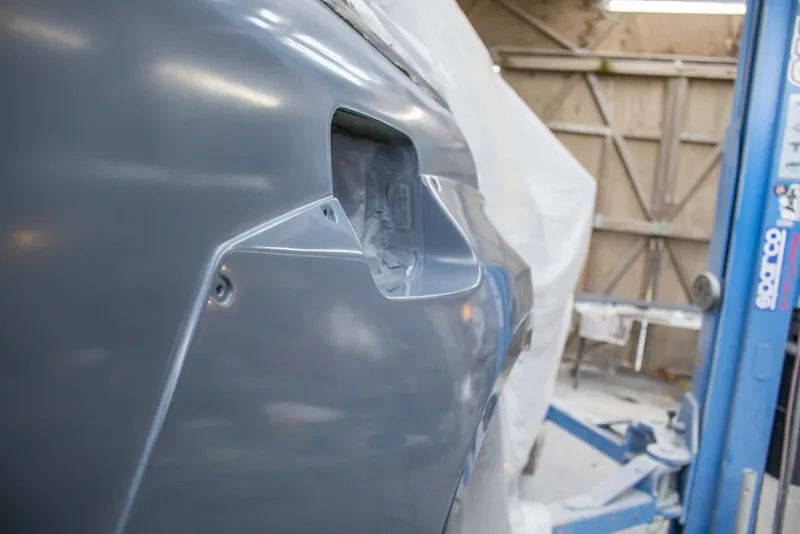
In the end I settled on 14mm which felt like the exact right size after doing a few test pieces. From then all I had to do was drill out the holes down to about 3.5mm from the metalwork (thickness of my fiberglass parts is around 3.5mm at the edges)
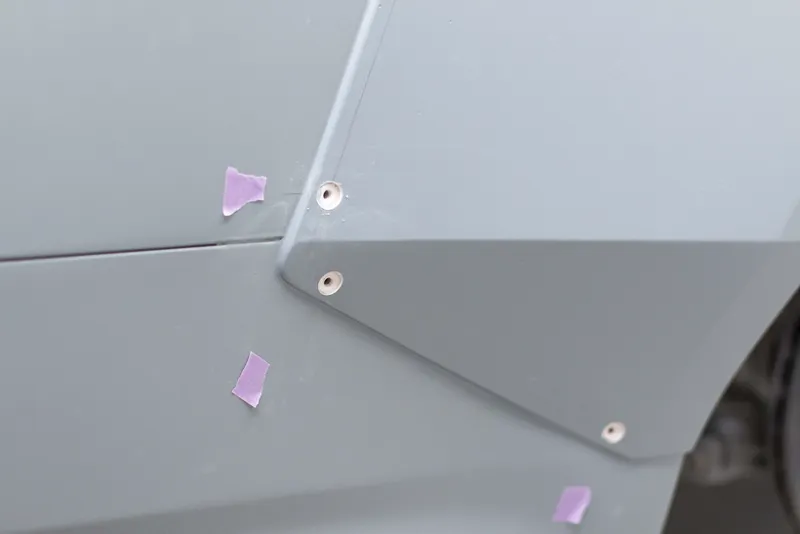
After drilling out all the holes the next step was to file the outside edges for clean slots. In typical me fashion, I did this for the entire rear fender before stepping back and looking at them and when I did I decided they were all 2mm too long so I filled them in, re-drilled the center holes, and did them all over again.
By happy accident, this is the exact process someone would have to do if they wanted to fill in these bolt holes and go for a hidden hardware look. So I'm glad I could give a demonstration of that as well.
With all the slots now shifted a couple mm further up, I was actually happy with how they looked and so I finished rounding over the edges and gave them all a coat of primer.
I was actually pretty happy with how those came out. Turns out it was way easier than I thought and I'd really been stressing about this for way too long.
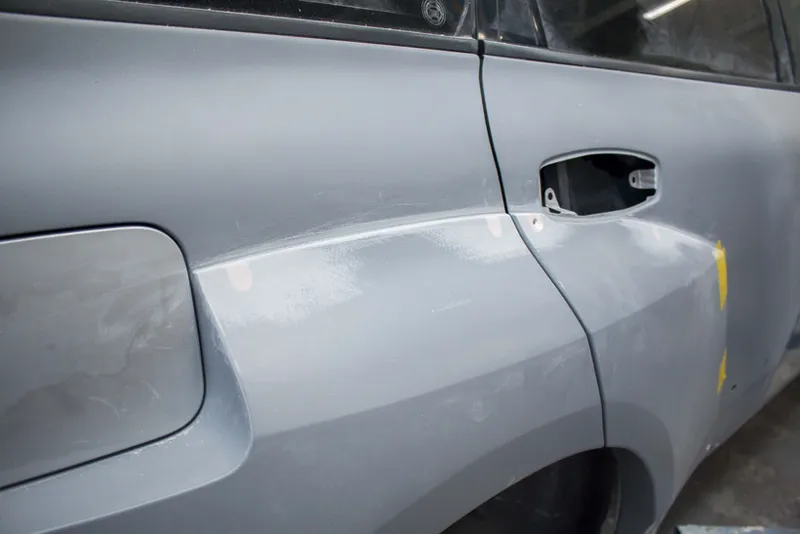
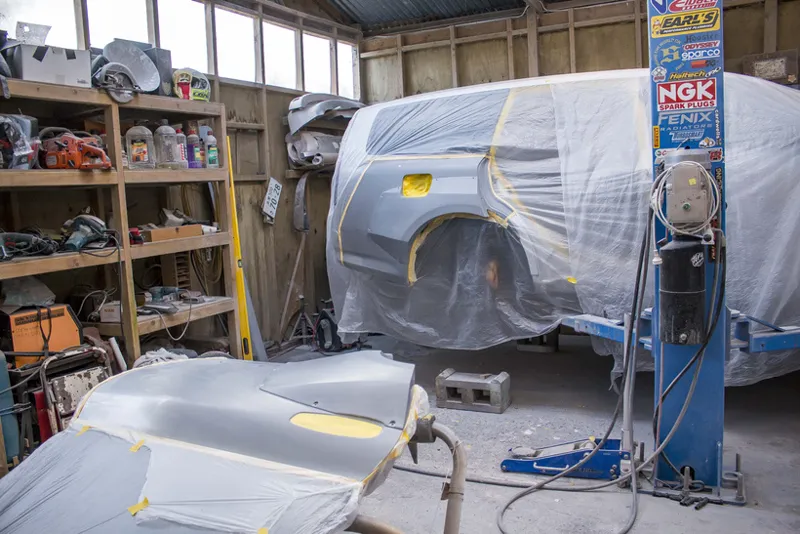
After than was done, I filled in the last remaining pinholes and sanded block sanded with 240 grit, followed up with the DA sander on 400/600 grit to prep the panel for sealer.
To seal the plugs I spoke to my fiberglass supplier about the issued I had last time when I used an epoxy sealer and it stuck to the mould surface. We suspect the issue was because the new tooling resin I'm using sets so much hotter than the conventional polyester resin I used in the past, the epoxy sealer was softening and fusing to the gelcoat.
To combat this I sprayed the plugs with a special polyester based surfacing primer designed specifically for tooling. It's called Prestec 2093, it sets rock hard and in theory should not soften from the heat of the resin, resulting in me getting a clean and effortless pull.
When I said this stuff sets rock hard, that was not an exaggeration. I tried going straight to the 600 grit disk on the DA sander and was getting absolutely nowhere. In the end just these 2 small panels took me half a dozen disks of 240 grit, and maybe 15 - 20 disks of 600. It was mental how hard they were.
But that was a great thing because it let me move straight into polishing to prepare the final plug surfaces.
I carried on with the DA using 1000 and 1500 grit before moving on to 2500 wet sanding. After that I used my machine polisher and some high cut compound to get a suitable finish. Nothing amazing but will be more than good enough for mould making.
That's where I'm at right now but the next step is to make some quick flanges for these, probably using cardboard and packing tape, and then go over them with the new release agents that I've picked up and then I'll be ready to start applying gelcoat and starting the moulds.
As a small Patron exclusive though, just to give an indication of what I do behind the scenes, I had some issues with those sideskirts I re-did.
So when I made my quick and dirty moulds, I got the mounting angle wrong and as a result the top edge that was supposed to bolt to the car just above the rocker panels didn't even come close to touching.
The solution to this was to grind away at the back side of the fiberglass until it broke through and I used the tape to hold it in place while I bent the top mounting face and fiberglassed it in place at the correct angle this time.
I used the yellow masking tape underneath the aluminium tape to give me a bright indicated of when I had sanded through the sideskirt.
After that I followed the standard approach for fiberglass repairs.
Starting out by mixing up my polyester resin, and then pouring a small amount of it into a pot with a few spoonfuls of West System 413 micro filler blend to make a quick paste that would help with gap filling and adhesion.
Straight away after that I applied a layer of 225, and 2 layers of 450 gsm chopped strand matt to build up the material and then fitted it back to the car to let it cure in the exact right position.
If my experience with fiberglass has taught me one thing it's to not trust anything. Any time you have to fiberglass something, always fit it to the thing it's supposed to be on, that's the only way to be sure that it will be the correct shape when it's set.
Then after that I kind of forgot about that for a couple days while I worked on the rear fender pieces, but after a couple of days I pulled the sideskirt back off and got started tidying it up and getting it ready for sealer primer next week when I continue the moulds for the rest of the kit.
And that wraps up the shop update for this week.
I'm hoping to get the fiberglass on these moulds before the video goes up next weekend so keep an eye out for that one when it goes up.